Most pizza is garbage. There are more great pizzerias in New York than in any other metropolitan area, but even in New York, most of the pizza is poorly stretched or underfermented. In most of the rest of the United States, you’ll find those same shortcomings but on incidentally thick, overly cheesed, cloyingly sweet monstrosities. If you believe the adage, “pizza is like sex: when it’s bad, it’s still pretty good,” you are part of the problem, and someone probably should have told you off before this moment.
There is no generalist food publication, YouTube video, or book that will help you make New York-style pizza. I’ve asked for people to prove me wrong on that claim for books, and the closest anyone has ever come to a reasonable suggestion was Peggy Paul Casella’s The Teenage Mutant Ninja Turtles Pizza Cookbook. If you must buy a book to show off on your dining room bookshelf during dinner parties, The Teenage Mutant Ninja Turtles Cookbook is the one that you want, but know that there will be no salvation in texts when it comes to New York-style pizza.
A critical problem in teaching mathematics parallels the situation with cooking education: in mathematics, there’s a tendency for students to memorize problem solutions rather than internalize why a solution works and extrapolate to solve other problems. Some students can go all the way through high school without actually understanding how to solve math problems. Everyone following that path of memorization crashes eventually, if they get far enough in math, and at that point, they have to significantly shift how they handle problems in order to proceed.
With cooking, there’s no crash, only stagnation. In the realm of pizza dough recipes, you’ll often see recipes with the concentration of water given firmly and without context. There’s no explanation of what water actually does in those recipes, and the water amount is often paired with a suggestion along the lines of, lick your kitchen wall to see if your kitchen seems drier than usual, and add more water to the dough, if so.
With this article, you will know what your wall-licker friends are doing to their doughs. And beyond that, you will have the tools to understand the role of methods and ingredients in pizza and extrapolate to design your own doughs for New York-style pizza and other pizza variants.
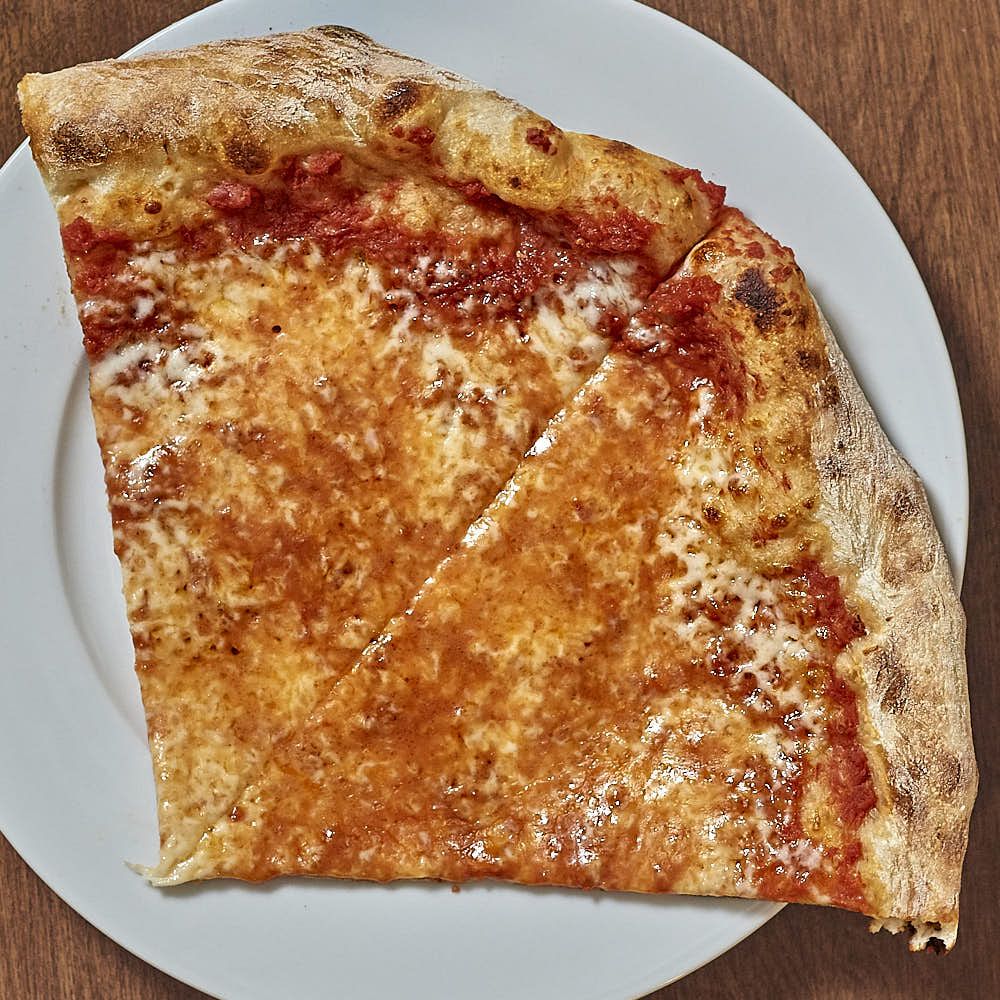
New York-style pizza is a thin-crust pizza born of an adherence to ratios. It’s hand-stretched, never rolled out, and it’s topped with relatively light amounts of cheese and tomato sauce, if there’s any sauce at all. The cheese is traditionally on top of the sauce, and it’s always low-moisture mozzarella, usually whole milk or partly so. The sauce is generally not pre-cooked, which can put it in the realm of pasta sauce instead of pizza sauce.
The pizza is baked in a deck oven, at a temperature in the neighborhood of 550°F to 650°F, several hundred degrees cooler than the Neapolitan pizzas that inspired it. In New York, the pies are large, usually 18 inches to 20 inches, and they’re sold as individual reheated slices, or “whole pies,” which are baked fresh. At home, you’re likely looking at baking closer to 550°F than 650°F, and the pies will have to be scaled down at 14 inches to 16 inches, but it’s entirely possible to make it great at home.
A pizza maker claiming that they use the best ingredients is like a novelist saying that they use the best words. If the story isn’t good, who cares? New York-style pizza is heavily driven by methodology, and knowledge thereof is the biggest limiting factor, besides interest, for the lack of decent New York-style pizza outside of the New York metro area. Outside of that metro area, it becomes rarer and rarer to find anyone that knows how to make New York-style pizza. It’s the same reason great bagels are rare outside of New York—it has nothing to do with New York’s water quality.
I’ve moved farther and farther away from New York since I started dating Abby, whom I’ve since married. Their career has taken me to Pittsburgh, and now the Twin Cities, where I’ll live, possibly, for the rest of my life. I’ve been marooned on New York-style pizza desert islands, and it became clear that if I ever wanted to eat a legitimate New York slice where I live, it would have to be made by my hand.
Equipment
Scales, Scrapers, and Bowls
When it comes to making any yeasted dough, scales, a bowl scraper (plastic and flexible), a bench scraper (metal and not flexible), and a large bowl will be invaluable, along with a good-sized working surface—I like to knead dough on a wood butcher block or cutting board.
As far as the scales go, you need the capability of accurately measuring about five pounds of dough, and for this recipe you’ll also want to be able to measure with 0.1g granularity. Finding both of those things in one scale can prove expensive, and my recommendation is to go with two scales to fill each niche.
I’ve liked OXO’s 11-pound scale as a large-capacity scale, which has an extremely convenient pull-out display. For quantities at around 3g or less (the OXO isn’t ideal at that range even if you don’t need more than 1g granularity), I suggest a Jeweler’s scale, which will measure with 0.01g precision. Be sure to also grab a matching calibration mass.
Baking Surfaces
As early as 2006, forum members on PizzaMaking.com were discussing using steel plates to bake pizzas. Carbon steel is a superior conductor to the cordierite baking stones found in many commercial deck ovens. Given the relatively high thermal capacity of a slab of carbon steel, a baking steel can narrow the gap between a home oven and a New York-style slice shop deck oven, and I used a steel plate to bake every single pizza featured in this article.
Due to its higher emissivity, a seasoned baking stone will radiate heat significantly more effectively than steel, so don’t buy a steel with the hope of putting it on the rack above your pizza to get great top heat. A stone above the pizza will do a better job of delivering heat into the top of a pie relative to steel, but better than both is a broiler at the top of your oven, if you have one. Or, if you have a convection oven that can reach 550°F, you may have enough top heat in your oven without the broiler.
Sufficient top heat is critical for baking a pizza, and lack of top heat is why you’ll never see passable pizza made in a grill without specialized equipment, the depths of fringe pizza styles notwithstanding.
And despite claims to the contrary from climate change denier Jeff Varasano, hacking your oven to bake on self-clean mode is a terrible idea, and it only serves to make awful, unevenly cooked pizza and risk the integrity of your oven range. Ovens can’t really handle self-clean mode for self-cleaning, forget about using it regularly to make pizza. Instead of self-clean mode, just make sure your oven is properly calibrated.
Steels
I recommend a rectangular steel for baking in your home oven. A 16-inch round steel won’t be able to fit a 12-inch square pan on it. You’ll add a marginal amount of weight for the added utility of square.
A 3/8-inch-thick steel will be able to store more energy than a 1/4-inch steel, and the former will retain more heat after a bake if you’re baking multiple pizzas in a night. A steel at a 1/4-inch thickness will still make great pizzas, especially if you’re only baking one pizza a night, and you’ll save some weight and money with that. If you think you might do more than one pizza night, go with a 3/8-inch steel. Thicker than 3/8-inch steel is unnecessary and heavy beyond the point of feasibility.
I would get the largest steel that your oven can comfortably fit. Some oven racks have a bump or lip toward the back, where the rack slides into the rear of the oven chamber. The bump can prevent some larger steels from fitting properly, which can can mean that the steel is on an incline or the steel prevents the oven door from closing. If the rack is an issue, you can compensate for the lip by putting a thin pizza stone or a smaller steel piece at the front of the rack.
I have a 16-by-16 3/8-inch A36 steel plate from Metal Supermarkets. Midwest Steel Supply also has A36 steel plate available. If you ask nicely, the metal shop might be able to bevel off the edges of the plate for you. And wherever you buy a steel plate, be sure not to get anything that’s galvanized—zinc fumes are toxic. I cleaned mine thoroughly with soap and water, and then sprayed it down with some vinegar and let it sit for a bit. There’s some mill scale on these things since it’s hot-rolled steel, but it’s harmless, though a longer vinegar soak should remove it. I also did a dry-run with the steel in my oven before baking anything on it.
If you want to buy a steel with less fuss, Baking Steel was the first to bring steel baking surfaces to market, and I started out with their 1/4-inch-thick 14-by-16-inch Baking Steel, and Dough-Joe has both 1/4-inch and 3/8-inch 15-by-15-inch steels.
Infrared Thermometers
Regardless of the steel that you buy, an infrared thermometer (IR thermometer) is an important tool to have in order to measure the surface temperature. For years, I’ve used a cheap Etekcity IR thermometer, which works well for dark matte surfaces at New York-style pizza temperatures or below. Cheap IR thermometers like the Etekcity model operate at a fixed emissivity which is tuned to give accurate measurements for dark matte surfaces, which is usually fine for measuring a steel for pizza.
Abraham Maslow once said that when all you have is a fixed emissivity IR thermometer, everything begins to look like a dark matte surface.
It’s worth looking at adjustable emissivity thermometers if you’re trying to measure other types of surfaces. Thermoworks’ IRT-2, which has an adjustable emissivity setting, can be accurate for all other sorts of surfaces, and it can measure up to 1022°F.
And if you truly only have dark mattes surfaces to measure but need hotter temperatures, there are also cheap fixed-emissivity IR thermometers that can measure up to 1022°F.
Proofing containers
Everyone uses two-quart Cambro containers to ferment pizza doughs, which are great containers in general, even for doughs, but they’re too narrow and tall for New York-style pizza dough. You need enough room for the dough to expand. If you can remove the dough from its proofing container and maintain its circular shape, that’s your best shot at getting a circular pie, and if you do everything right, a circular pie means a uniformly stretched pie, which can have a huge impact on the cooking dynamics of the entire pizza. Using Cambro containers, or worse, deli containers, will get you unevenly thick and irregularly shaped pizzas.
I use aluminum proofing containers and lids. Mine are the nine-inch variant, but if you’ll never make pizzas larger than 14 inches, then eight inches should work fine for you. The containers themselves are stackable for storing, but I find they don’t really stay level when stacked, so you should buy and use the lids when putting the containers in your fridge.
I’ve used plastic proofing containers and lids, but I’ve come to prefer how my dough proofs in the aluminum pans, and the doughs I make now are too large for these containers, but if you never plan on making pizzas larger than 14 inches, then the size shouldn’t be an issue. They’re thick, but they’re fine in a dishwasher.
Dough does stick more readily to metal containers than it does to plastic containers, but that can be easily remedied by removing the dough from the container immediately when it’s done proofing in the fridge and reapplying a thin layer of oil before placing the dough back in its proofing container.
Mixers
You can mix your dough by hand and get as good of a resulting dough as with any mixer. Mixers save effort, but they do not make better pizzas versus properly performed hand mixing. This recipe, along with all of my major dough recipes, was developed initially by hand, and you do not necessarily need to consider using a mixer.
If you have a KitchenAid mixer, you can likely use that for making pizza dough. I strongly suggest using your mixer on the slowest setting to avoid over-stressing the mixer. Some KitchenAid models have a plastic worm gear that can strip if pushed too hard.
Spiral mixers serve as an alternative to planetary mixers like KitchenAids. The bowl rotates as the dough hook spins in a fixed position. Spiral mixers also typically have breaker bars, vertical bars that are positioned in the middle of the mixer bowl that serve to help better mix dough and prevent the dough from climbing up the dough hook.
Spiral mixers for residential use have been available in the United States for a while, but they all lacked breaker bars, and without the breaker bar, their utility for dough isn’t much better than a KitchenAid. As of this year, Italian spiral mixers with breaker bars are now being imported in the United States. Note that these mixers are built specifically for making dough, and the dough hook is not removable. Spiral mixers with breaker bars are not mixers for whipping or making batters.
Famag makes a spiral mixer with a breaker bar. There’s a variant with a tilting head and removable bowl (IM-5S) and a variant with a fixed head and bowl (IM-5). There are some minor potential issues that have been reported which includes breaker bar drift, and there’s more of a gap between the breaker bar and bowl for the removable bowl variant only.
Sunmix offers the SUN6, a fixed bowl spiral mixer with a breaker bar, and it’s small enough to fit on a counter under a typical kitchen cabinet. I own a SUN6, and I’ve been very happy with it. The breaker bar is firmly in place with no drift, and, as a fixed bowl mixer, the breaker bar-bowl tolerance is very tight. The mixers come with a timer and LED light to illuminate the bowl.
With spiral mixers, you can put the dry ingredients right into the mixer bowl, and let it run while you measure out the wet ingredients. The mixer will uniformly distribute the dry ingredients, and then you can throw in the wet ingredients and let it run. The dough will come together well even without pre-mixing.
I can't claim that my doughs are better than what I’ve made by hand or with my KitchenAid, but the doughs come together with significantly less fuss. And as far as fixed bowl mixers go in general, they’re relatively easy to clean if you clean them with a damp towel soon after finishing a dough.
Peels
You should use a wooden peel to launch your pizza and a metal peel to turn or retrieve your pizza. Dough is much more likely to stick to metal peels than wood, and so wood is ideal for launching pizzas. Removing or turning cooked pizzas with a wooden peel increases the chance of getting grease on them, which will necessitate washing the peel, and this increases the chance of the peel warping.
My favorite wooden peel is from Lillsun, and it comes in many sizes, including a short-handled 16-inch take-out peel. Lillsun’s take-out peels are much thinner and rougher than the peels I’ve owned from Baker’s Board, which are also good peels, and their Gourmet line of peels in cherry would look nice hanging in most home kitchens. Lillsun's roughness may marginally help mitigate sticking, but really, you shouldn’t have much trouble with either peel.
The best value for a metal peel is American Metal Craft’s metal peel. You’ll have an easier time turning your pizza (if necessary) with a smaller peel, and so generally it’s a good idea to size down on your retrieval peel. I’ve used a 13-inch peel to remove 20-inch pizzas, and a 12-inch peel should be more than enough for a 16-inch pizza.
My favorite retrieval peel is a GI Metal perforated peel, but it’s solidly a luxury item for home cooks, priced at an order of magnitude more than American Metal Craft’s offering. I bought it to launch higher temperature pies (think 900°F), and I’ve really liked it for removing New York-style pizzas, too. The edge is slightly tapered, and it slips under pizzas very easily. Also, in my experience, the perforations also can help shed a bit of excess flour on removal.
You’ll need to dust your peel with flour. Regular flour can work (AP flour or bread flour are fine), but you’ll need to use a light hand, or you’ll wind up with flour caked onto flour. It’s a delicate balance, and for most folks, it can be easy to end up with a dough that sticks to the peel or a bottom covered in flour.
Semolina flour can help keep your dough from sticking to the peel, and a light, uniform dusting can go a long way. I like standard semolina for dusting peels versus finer semola rimacinata, since the former is less likely to stay on the bottom of the pizza. I use a shaker, but you can also just do it by hand.
Corn meal is not appropriate for New York-style pizza. Some would say semolina isn’t either and that only plain flour is used to dust peels for New York-style pizza, but corn meal isn’t debatable. You can use it, but I will never tell you that it’s OK, and if you do it, I don’t want to know about it.
Pizza Cutters and Pans
Cut your pizza on a pizza pan. Never cut pizza on top of your wooden peel. You will damage the peel and soil it with grease from your pizza.
And as far as pizza cutters go, my favorite for New York-style pizza is a 5” Dexter-Russell pizza cutter. I’ve used many pizza wheels, but they’ve all been had poor performance compared to Dexter-Russell’s offering. You can replace the blade, so when you dull your cutter too much, you don’t have to pay the full price to replace it.
Screens
Pizza screens are used by pizzerias that can’t or won’t train their workers to launch pies into their ovens. Screens slow down the bake time of a pizza and shift the primary mode of thermal transfer for the bottom of the pizza from conduction to radiation, which significantly slows down the bake of the pizza and negatively impacts its rise.
It’s logistically much simpler to stretch the dough and put it right on a screen rather than having to deal with a peel, which is why it’s such a common practice. For pizzerias, it’s much easier to train staff to use a screen than it is to use a peel. Some pizzerias serve pies on screens, which doesn’t necessarily mean they were baked on screens. Look for a screen print, or a patterned indentation, on the bottom of a pizza as an clue that a pizza might be screen baked.
Dough
New York-style Pizza Dough
Modern New York-style pizza dough consists of flour, water, salt, yeast, sugar, and fat. Sugar and fat aren’t required ingredients, but they’re typically found in New York-style pizza doughs. New York slice shops used to put lard or shortening in their doughs, and most of those shops have switched to vegetable oils if any oil at all.
Most pizza recipes feature excessively wet doughs, and it’s become a trend across generalist food publications and YouTube. New York-style pizza dough is not traditionally a wet dough. Neapolitan pizza, from which New York-style pizza is derived, is also not a wet dough.
The concentration of water in a dough, known as the hydration, for a typical New York-style pizza dough is targeted around the value that maximizes the strength of the dough or sometimes a slightly lower value than that. That means a hydration percentage range from the high 50s to the low-60s, relative to the total mass of flour.
Gluten and Dough Additives
Gluten is formed by a network of proteins primarily made up of glutenin and gliadin, which are water-soluble and water-insoluble, respectively. When hydrated, glutenin provides strength and elasticity to a dough while gliadin increases viscosity and provides extensibility, which contributes to rise.
The most basic form of glutenin, glutenin monomers, bind together and elongate to form chains known as polymers. The polymerization of glutenin increases dough viscosity, and an increase in large glutenin polymers is directly related to dough strength and rise.
After a dough is mixed, resting it leads to an increase of large glutenin polymers, but overmixing and overfermentation can weaken dough through the partial depolymerization of glutenin, which also decreases dough viscosity and increases stickiness. Additionally, overmixing can decrease dough extensibility. Gluten is sometimes said to be “degraded,” and that can serve as a shorthand for the weakening of dough and decrease in viscosity.
Sodium chloride (pure kosher salt or sea salt) increases dough stability and thereby dough strength. Salt increases mixing time by slowing the rate at which flour hydrates, and when salt is added to an overmixed dough, the salt can actually reverse the effects of overmixing and recover dough stability and strength. Salt decreases dough stickiness similarly to how kneading can decrease dough stickiness, and salt increases browning as it enables Maillard reactions to occur for longer.
It would take more salt than you’d normally see in a yeasted dough to have a substantive negative impact on your yeast. If you want to withhold salt from your dough for the initial mix, the main impact will be a mixing time speed-up, which can be a boon in a commercial setting. Mixing without salt can lead to the mix occurring as much as twice as quickly.
Like salt, sugar also draws moisture away from yeast, but similarly, the concentration of sugar in pizza dough shouldn’t be high enough to be detrimental to the yeast. Sugar in the context of pizza dough is used to aid browning, but there shouldn’t be enough sugar in a pizza dough to make the dough sweet.
Fats, like water, can act as a dough plasticizer and improve dough extensibility and softness, but when adding fats, unlike water, dough stickiness does not increase. Solid fats with a high melting point, like shortening or lard, serve to increase dough volume and promote a fine crumb structure due to the presence of many small fat crystals that help stabilize gas bubbles in the dough. Fats also decrease crispiness, but in the context of breads, fats can serve to mitigate staling by limiting the transfer of moisture from a bread loaf’s interior to the exterior crust while the bread is being stored.
Wheat
There are hard wheats and soft wheats, which refers to the wheat kernel. Hard wheats yield flours which form doughs that are higher in gluten versus those of soft wheats. Hard wheats are ideal for bread flours and other relatively high-gluten flours. Soft wheat is used as the basis for low-protein flours like cake flour or pastry flour.
Both hard and soft wheats can be classified as red and white, which refers to the color of the wheat kernel. Red wheat generally has a higher protein content than white wheat. There’s spring wheats and winter wheats, which refers to when their seeds are sown, but to narrow the scope a bit, for the purposes of pizza, we’re concerned with hard red winter wheats and hard red spring wheats.
Hard red spring wheat generally has more protein, both in terms of glutenin and gliadin, than hard red winter wheat, but they can each vary in protein content. And beyond the variety of wheat, the milling and starch integrity can also play a role in the quality of the resulting flour.
It’s worth noting that durum wheat is actually the hardest wheat, and that’s the wheat from which semolina flour comes. But the resulting gluten is not necessarily appropriate for supporting a bread dough, and you need to choose your durum wheat flour carefully.
Massimo Laveglia, owner and operator of L’industrie Pizzeria, one of my absolute favorite pizzerias, put me onto Molini del Ponte’s semola rimacinata. He told me that the flour works well for bread doughs, even if it’s the only flour in the dough, though it may prove somewhat difficult to handle. I’ve had great success with the flour for pasta.
King Arthur Flour uses hard winter wheat for its all-purpose flour (known commercially as Sir Galahad), and they use hard spring wheat for their bread and high-gluten flours (known commercially as Special Patent and Sir Lancelot, respectively). Central Milling’s Artisan Bakers Craft Plus and Bee-Hive are both made from hard red winter wheat, and the latter is what Whole Foods uses for their house brand AP flour, which is relatively low gluten and inappropriate for pizza dough.
Flours
My recipe is designed with King Arthur’s All-Purpose flour in mind, though it’s been tested with many other flours. King Arthur flours are all “unbleached,” which is to say they’re bleached through aging, but not with benzoyl peroxide, chlorine, or another chemical bleaching agent, as you would see with bleached flours (chlorine-based bleach is typically not used for high-protein flours).
King Arthur All-Purpose is at around 11.7% protein versus King Arthur Bread Flour’s 12.7%, and it’s a relatively strong flour, similar to bread flours you’d find from other brands. King Arthur All-Purpose flour is significantly stronger than standard supermarket all-purpose flour. I find that King Arthur All-Purpose provides just enough chew for New York pizza without being too chewy, which is how I would characterize King Arthur Bread Flour, and there’s more than enough gluten-forming protein in King Arthur All-Purpose Flour to stretch thin New York-style pizzas.
The all-purpose flour offering from King Arthur is significantly stronger than most flours labeled all-purpose
and it’s about as strong as typical bread flours. Do not buy all-purpose flour for pizza unless it’s specifically known to be very strong—typical supermarket all-purpose flour lacks the proteins needed to support pizza dough. Bleached bread flour can behave similarly to King Arthur’s All-Purpose Flour, and Pillsbury bread flour has worked well for me as a last-minute supermarket substitution.
You can also buy Sir Galahad, the commercial label for King Arthur All-Purpose, in larger portions. 50 pounds is a lot of flour, and for home cooks, you’ll need to have a storage plan, which probably ought to involve freezing most of it. You also might want to consider wearing a mask while you parse out a 50-pound bag, so you don’t breathe in excess flour.
General Mills All Trumps flour is a popular bromated flour among New York slice shops, but in my experience, All Trumps works best in same-day doughs and doughs fermented for a day in the fridge, rather than two- or three-day fermentations. New York-style pizza doughs that I‘ve made with All Trumps feel substantively weaker after three days in the fridge, and I recommend against using it for your first time with this recipe.
I’ve also tested the recipe with Artisan Bakers Craft Plus, and it will work, but I’ve found it’s slightly weaker than King Arthur All-Purpose, and it degrades much more rapidly than King Arthur All-Purpose even after the three days of fermentation for this pizza recipe. I wouldn’t use any weaker flours than that, and you should note that King Arthur All-Purpose Flour is significantly stronger than typical all-purpose flour, and so most all-purpose flour will not serve as a substitute for King Arthur.
Peak Absorption
Each flour has a hydration level that maximizes dough stability and strength. This value is known as the peak absorption or the farinograph water absorption of a flour. Having less water than the peak absorption or surpassing the peak absorption of a flour yields a weaker, less stable dough, and the detriment to stability and strength increases as the hydration tends away from the peak absorption.
When starting out, for pizza doughs, my suggestion is to stick to not venture too far beyond the peak absorption of a flour, and dough will be stickier at hydrations beyond peak absorption. But, short of using a farinograph, there’s no way to determine the peak absorption of a given flour beyond just experimenting. For most bread flours, you’re looking at targeting a hydration in the neighborhood of 60% relative to the total mass of flour. As of 2012, King Arthur claimed that the peak absorption of King Arthur All-Purpose (Sir Galahad) was 59-63%; the peak absorption of King Arthur Bread Flour (Special Patent) was listed at 60-64% and that of King Arthur High-Gluten Flour (Sir Lancelot) was listed at 61-65%.
In general, peak absorption increases with the amount of glutenin in a flour. Higher protein flours usually have more glutenin than lower protein flours, and you can use that as a loose guide for estimating peak absorption. However, two flours with similar amounts of protein do not necessarily have similar amounts of glutenin: Central Milling’s Artisan Bakers Craft Plus is listed at 11.5% protein versus King Arthur All-Purpose’s 11.7% protein, but in my experience, the Central Milling flour has noticeably less strength than King Arthur’s, and the Central Milling flour likely has less glutenin than you’d expect given their very similar levels of protein.
Both starch integrity and the presence of bran in whole grain flour can increase a flour’s peak absorption. With that said, bran interferes with gluten formation, which stands as a reason for why whole wheat flour should be avoided for New York-style pizza.
Malt
Malted barley flour is added to most flour in the US, including all of the aforementioned flours. The barley malt contributes amylase, which helps enzymatically break down the starches in flour into sugar. This gives yeast a boost, and it leads to, most evidently, better browning in home ovens and pizzeria deck ovens. Neapolitan pizza, which is baked in wood-fired ovens at temperatures hotter than 800°F, is made with unmalted high-protein 00 flour* to avoid burning at those high temperatures, and that flour helps achieve high-contrast leopard-like spotting.
You need to add diastatic malt powder to unmalted flour in order to use it in a home oven setting, but if you add malt to flour, do so sparingly: for purer malts (King Arthur’s offering may be more diluted) start with no more than 0.55% diastatic malt powder relative to the total mass of unmalted flour.
I don’t add diastatic malt powder to malted flour when making New York-style pizza because I find that it doesn’t have much positive impact, and it can decrease dough viscosity and strength. I’m less sour on diastatic malt powder for pan pizzas, a context in which dough strength is much less of a concern.
Note that non-diastatic malt powder is heat treated, and it will not contribute to the enzymatic breakdown of flour. Carnation Malted Milk is an example of non-diastatic malt powder. You do not need this for pizza, though you may use that or barley malt syrup for bagels, and the latter also offers no enzymatic breakdown of dough.
*Note on 00 Flour
00 describes how refined the flour is, that is, how finely milled and how little bran and germ remain in the flour, but it gives no indication of the flour's protein content. Seek out high-protein 00 flour, or 00 pizza flour, if want to experiment with 00 flour in pizza, and you will need to add diastatic malt for New York-style pizza.
Bromate
Some commercial bleached flour is bromated, or treated with potassium bromate, an oxidizing agent that helps improve dough rise and texture. Bromated flour also helps strengthen dough, and it enables faster mixing.
Potassium bromate is believed to be carcinogenic, though in the context of doughs, it was found to degrade rapidly at temperatures of 300°F to 500°F, possibly due to metal ions in flour. Internal temperatures of bread and pizza don’t generally reach temperatures much hotter than 200°F, but the decomposition of potassium bromate is a function of initial concentration, temperature, and time, and so while bromate will degrade in a cooked pizza, it’s unclear if it does so to safe amounts.
Potassium bromate may also be used for producing malted barley, but for that context, regulations restrict the concentration of potassium bromate to 75 parts per million of potassium bromate, which is the same as the limit for wheat flour.
Even if the concentration of bromate in a given end product is believed to be considered insignificant, bioaccumulation remains an unknown: there is no clear evidence to indicate whether or not bromate is able to accumulate in humans.
Potassium bromate has been banned by the European Union and declared a carcinogen by California under Proposition 65, and even in New York City, where it’s allowed, many modern slice shops have chosen unbromated flours. All of the flours mentioned in this article are unbromated.
Whole Grain Flour
Whole grain flour, flour which has the bran, endosperm and germ intact, is wildly inappropriate for New York pizza. If you disagree, please email me. If you have no regard for aesthetics and taste, then you should recall that the extra fiber from the bran has a deleterious effect on gluten formation in a way that more than negates the extra protein in whole grain flour.
If you want to mill your own flour, you absolutely can, but you need to sift away the bran. Scarr’s Pizza uses freshly milled flour, which Scarr’s mills in-house, and they sift away the bran from the flour. Without sifting you’ll wind up with whole grain flour, and it’ll taste like it. Scarr’s Pizza, which stands as one of my favorite pizzerias on the planet, does not taste like it’s made with whole grain flour.
Scarr Pimentel, owner and operator of his namesake pizzeria, put me onto Wild Hive Farm, which offers, among many other things, both bread flour and wheat berries, the latter of which you can grind yourself if you’re so inclined.
In addition to a thorough sifting, if you grind your own flour, you’ll need to add diastatic malt to freshly milled flour for it to brown properly at New York pizza temperatures.
Yeast
Instant yeast, active dry yeast, fresh yeast (cake yeast) are all different vehicles for delivering strains of the same species of yeast, saccharomyces cerevisiae. Commercial yeast products are not some sort of unnatural synthetic abomination. They’re all living yeast, and for most bakers they’ll all much more reliably ferment doughs than the yeast and bacteria cultures found in a sourdough starter, and that reliability will facilitate learning about fermentation and dough handling.
For New York-style pizza, my strong recommendation is to go with commercial yeast over sour starter. Beyond the aforementioned issues for beginning bakers, sourdough introduces degraded gluten to the dough, which can be detrimental to uniformly stretching dough in New York-style pizzas, and the dough pH decreases associated with sourdough starter can negatively impact dough elasticity and strength.
As far as commercial yeast products go, for home use, my suggestion is to use instant yeast. Instant yeast is more fool-proof than active dry yeast, and you can easily just add instant yeast to your dry ingredients while making a dough without worrying about warming it up in water first (you can also treat active dry yeast the same way for proofs on longer timescale).
A lot of pizza makers and bakers like to use fresh yeast, and they have the ability to obtain it and use it quickly, but for home cooks, it’s usually impractical. You should see no detriment in using instant yeast versus fresh yeast, but you should know that fresh yeast is mostly water, and so that needs to be considered when converting a recipe between fresh yeast and instant yeast.
SAF Instant Yeast
SAF Red Instant Yeast is my favorite yeast to use. It comes in a one pound portion, and so when I get it, I open it, use it, and then freeze it all in a freezer bag and use it straight from the freezer for all of my recipes thereafter. You should be able to keep it for around a year in the freezer without any issue. It will last much longer in the freezer than in the fridge, and every dough I’ve made with commercial yeast in the past few years has been made with straight-from-the-freezer instant yeast.
SAF Red is a little pricier than store-bought yeast if you have to buy it online, but if you consider the quantity and longevity of the yeast in the freezer, you can amortize the cost over the duration of usage, and it’s really not that expensive.
The following stockists have SAF Red available for shipment online:
And in case you run across a gold-colored SAF variant, you should know, it’s an osmotolerant strain of S. cerevisiae, and it can handle the osmotic pressure which occurs in doughs with high concentrations of sugar (or salt). SAF Gold is intended for sweet breads with 10% sugar (relative to the weight of flour) or more. It’ll work for pizza and breads that aren’t sweet, but you won’t get as strong of a rise when compared to Red. Stick with SAF Red unless you want to hold onto two types of yeast.
Water
Most people making New York-style pizza probably don’t need to worry about their water, but if you know that your water is particularly problematic, including being excessively hard or soft, you can just buy a gallon of water, but be sure that it's that’s free of chlorine and chloramine.
Chlorine or chloramine can negatively impact yeast depending on their concentration in the water. Most city water supplies won’t have enough chlorine or chloramine to be substantively detrimental to commercial yeast doughs, which are much more robust against chlorine and chloramine than sourdough.
Chlorine can be removed through boiling or letting the chlorine evaporate. If you boil your water to remove chlorine, it goes without saying that you should let it cool completely before using the water for dough. Removing chloramine is the stuff of bitter debate and the remedy likely depends on the concentration and type of chloramine in your water. Again, this is unlikely to be an issue for you when using commercial yeast.
Sauce, Cheese, and Other Toppings
Sauce
When people find out that I make my own pizza, I’m often asked if I “even make my own sauce.” The answer is yes; it makes a monumental difference, and it’s barely more complicated than opening up a can.
New York-style pizza sauce is uncooked crushed tomatoes and salt. Those are the only required ingredients. You can buy your tomatoes crushed or crush them yourself. You can add basil or dried oregano, and I do, but really, it’s minimal. Again, New York-style pizza sauce is not cooked. I believe sauce is sweet enough without adding sugar, but I can’t say that no popular shop adds sugar. I strongly recommend not adding sugar.
Most whole peeled tomatoes have calcium chloride added as a firming agent. People expect cans of whole canned tomatoes to have whole tomatoes in them, and calcium chloride helps keep them whole. The best whole canned tomatoes don’t have calcium chloride added to them, but for many brands, crushed tomatoes are often a better bet than whole canned tomatoes.
If you wind up with whole canned tomatoes, you’ll need to crush the tomatoes. Do not use a blender to crush your tomatoes. A blender will turn your sauce orange as it whips air into it and oxidizes it. Immersion blenders work well, as do food mills. Stick to those. Don’t try to remove the seeds from the tomatoes as the inner pulp that contains the seeds contributes significant amounts of umami flavor to the sauce.
Cooking your sauce will make your pizza taste like it was topped with pasta sauce rather pizza sauce. Sauce variants like vodka sauce ought to be cooked, but when it comes to plain pizza sauce, don’t cook it when it comes to New York-style pizza.
There’s a lot of hype around Denominazione di Origine Protetta (D.O.P.) San Marzano tomatoes, tomatoes certified by Italy to have been grown in volcanic soil at the base of Mount Vesuvius. It’s a nice story, which is why the tomatoes are name-dropped on high-end restaurant menus across the country. But I’ve only ever had one D.O.P. San Marzano tomato that lived up to the hype, and the rest of them have been of middling quality at best. Generally speaking, American tomatoes, from California and New Jersey, are the ideal tomato for New York-style pizza—not everything from Italy is better.
You might be tempted to use your own homegrown tomatoes for a sauce, but it’s unlikely you’ll grow tomatoes that taste as good as the best canned tomatoes, which are great tomatoes that are canned at peak freshness. If you must can your own tomatoes for pizza use, remember, never blend them, and be sure to add citric acid or bottled lemon juice: at this point, tomatoes are not consistently acidic enough to reliably safely can without additional acid.
Canned Tomatoes
Gustarosso makes an incredible retail-sized 28-ounce can of tomatoes, and theirSan Marzano tomatoes are the only D.O.P. San Marzano tomato I’ve ever loved, or even liked, but at $0.25/ounce, they’re expensive, especially compared to whole-sale pricing for Alta Cucina. Maybe grab a can of Gustarosso tomatoes if you’re buying from Gustiamo already and try it for yourself.
As far as larger 100-ounce commercial tomato cans go, I recommend Stanislauss Alta Cucina and Bianco DiNapoli’s Rustic Crush. Those are specific recommendations, and and you should not take this as a recommendation for other tomatoes from those brands. Bianco DiNapoli’s retail tomatoes are completely different products, and they’re nothing like the Rustic Crush. If you can get into a Restaurant Depot they regularly carry Alta Cucina tomatoes, and without shipping costs, they’re an incredible value.
The size of these commercial cans can make them burdensome to use for home cooks—raw tomatoes from the can substantively lose quality when frozen and they can’t be used raw on tomatoes thereafter. I generally turn tomatoes into a marinara sauce, vodka sauce, or Bolognese sauce prior to freezing.
When it comes to both Alta Cucina and Gustarosso tomatoes, I don’t drain the cans before immersion blending, I immersion blend the entire can, and it’s a good consistency for pizza sauce.
I often find myself using Sclafani’s crushed tomatoes since the cans are smaller and a bit more accessible for home quantities. Their whole canned tomatoes do have calcium chloride as a firming agent, so stick to the crushed only. I don’t love the taste or texture out of the tomatoes out of the can, and in that sense it’s the worst of everything mentioned here, but if you immersion blend the tomatoes with a bit of basil and add a good amount of salt, some dried oregano, and a bit of water, I’ve been happy with them for my New York-style pizzas. They should be pretty easily obtained at Shop-Rite.
Cheese
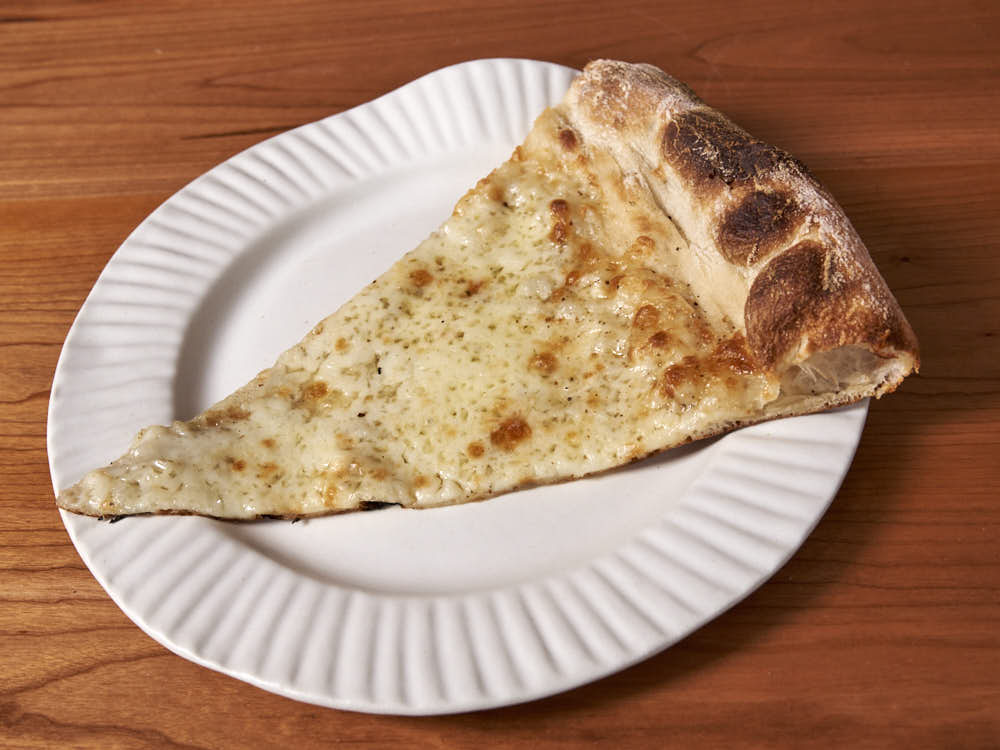
Cheddar cheese does not go on New York-style pizza. If you lack mozzarella, you lack New York-style pizza cheese, and you can proceed with a cheeseless pizza. That’s OK. Top it with some very thinly sliced garlic before you bake the pizza, add some parmesan, and everything is fine. You may accuse me of gatekeeping, but this is no more gatekeeping than is the requirement that trains be affixed to rails.
Fresh mozzarella is inappropriate as the primary cheese for New York-style pizzas: it’s relatively wet compared to low-moisture mozzarella, and it’ll never melt and brown quite right. Fresh mozzarella is ideal as the primary cheese for pizzas cooked much hotter temperatures, but those are cases in which the cook time is often best measured in seconds, rather than minutes. It’s a whole different ball game, and what’s ideal for those styles of pizza is not necessarily ideal for New York-style pizza.
Low-moisture mozzarella, also known as aged mozzarella, is the ideal cheese for New York pizza, specifically, aged whole milk mozzarella. Since it’s aged, so won’t be remotely as wet as fresh mozzarella, it’ll brown at New York-style pizza temperatures, and it’ll have a tangier flavor. Additionally, due to the enzymatic breakdown of the cheese, aged mozzarella will have less lactose than fresh.
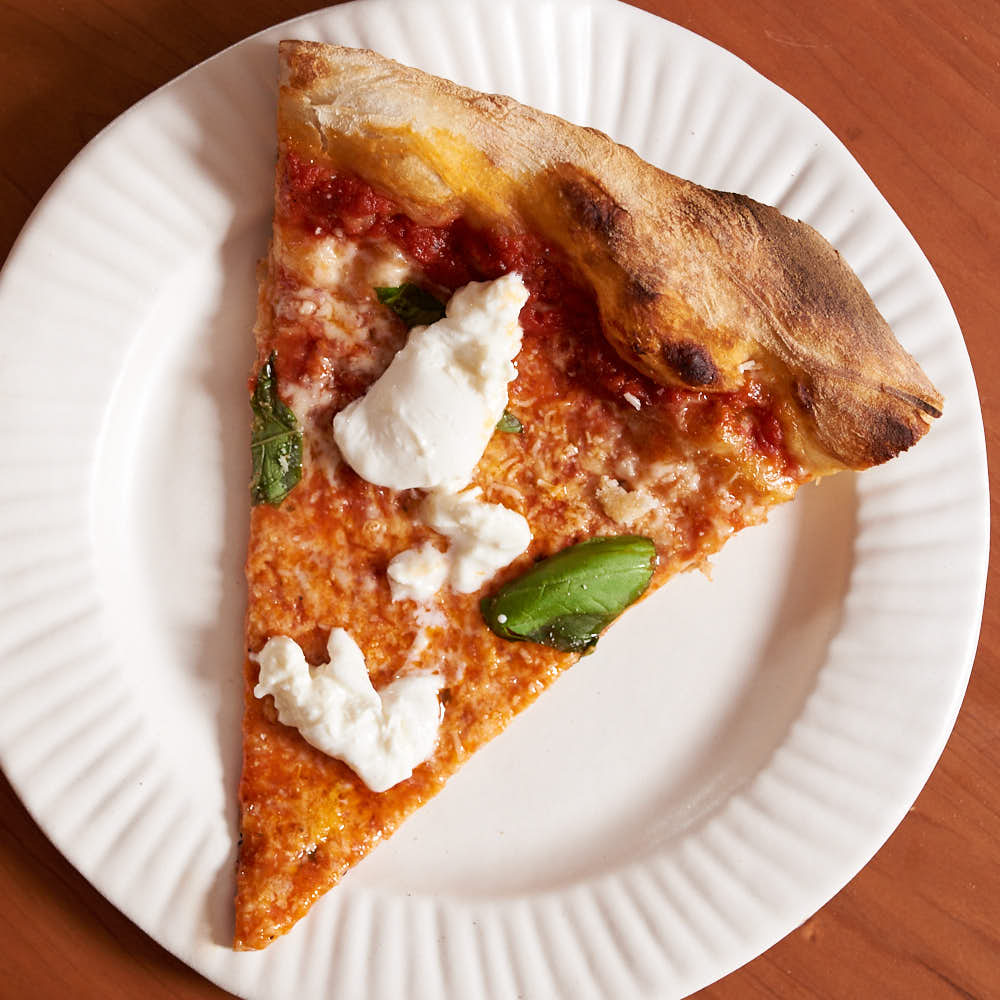
Fresh mozzarella can sometimes work as a topping on a white New York-style pizza—the fresh mozzarella would be addded on top of the low-moisture mozzarella. In this context, the fresh mozzarella contributes creaminess and richness, but you still get the flavor of New York Pizza with low-moisture mozzarella serving as the primary cheese. Proceed with caution, and use it sparringly, if ever. I don’t find fresh mozzarella provides any benefit to a plain pie with tomato sauce.
While whole milk mozzarella is the key to nailing New York-style pizza cheese, it’s worth noting that some pizzerias will cut their whole milk mozzarella with part-skim mozzarella to prevent the cheese from contributing too much oil to the pizza. The part-skim contribution also makes the cheese brown a little bit faster overall. I use whole milk mozzarella only, but a light hand on the cheese helps keep the pizza from seeming too oily. I’d start with whole milk mozzarella only, and make your decision from there. Generally, you’d want one-third-to-one-half of your cheese to be part-skim.
Shredding
Shred your own cheese: Almost all pre-shredded cheese has starch or cellulose powder added as an anti-caking agent so that the cheese doesn’t clump together. Pre-shredded cheese with those additives will never melt as well as cheese that you grate yourself, which is unadulterated cheese. I recommend a Microplane ultra coarse cheese grater for grating mozzarella, which gets you very wide and thin shreds that get me a great melt. I’ve also used Rösle coarse grater, which is a good grater, but it will yield thicker and slightly narrower shreds.
Grande sells a pre-shredded mozzarella that’s just cheese with no adulterants—Grande gas flushes their shredded mozzarella with gas to obviate the need for anti-caking agents. But one of the adulterants that’s typically in pre-shredded cheese, besides anti-caking agents, is natamycin, an anti-fungal preservative used to inhibit mold. Without natamycin, given the high surface area-to-volume of Grande’s relatively fine pre-shredded mozzarella, the cheese will develop visible mold if left to sit in the fridge for a couple of days. Beyond the potential for mold, I prefer the melt that I get when I use a coarser shredded cheese, shredded with the aforementioned graters.
Pre-shredded or not, freeze the mozzarella that you can’t use within a few days to avoid mold development. I’ve frozen my mozzarella both before shredding it and after, and I’ve found that there’s no detriment to quality after freezing. Most of the low-moisture mozzarella that I use for pizza is frozen, and freezing will have no impact on meltability, texture or acid content of the cheese. Parse out the cheese into reasonable portion sizes prior to freezing—assume that once you defrost your cheese you will use all of it within several days.
Aged Mozzarellas
My favorite aged mozzarellas for New York Pizza are Grande’s whole milk low-moisture mozzarella and Caputo Brothers Creamery’s Fior di Pizza. I’ve found that both cheeses melt as well as I could hope for New York-style pizza. The Fior di Pizza is fairly expensive at $11 per pound, but I really love its buttery flavor.
Saputo’s Lugano whole milk mozzarella is a good cheese, though in my experience, it’s aged a bit inconsistently. My local Whole Foods in Saint Paul carries the Saputo Lugano cheese erroneously labeled as “Grande,” which is something to watch out for with Saputo in general: I’ve also bought Saputo Premium Gold that was labeled as Grande
by another shop. I liked Saputo’s Premium Gold, which is Saputo’s Grande competitor, but it’s been years since I’ve used it.
Trader Joe’s low-moisture whole milk mozzarella is a great commonly available retail cheese, and I’ve had great results when I’ve used it for pizza. Last time I checked, it was $5 per pound, which will make professional pizza makers gasp, but it’s actually a great price for retail mozzarella.
If your supermarket deli section has whole milk low-moisture mozzarella, that could be a good option. Boar’s Head isn’t my favorite cheese (and it was north of $10/pound when I last bought it), but it works well enough, and like most cheeses in the deli section of a supermarket, it’s very aged, since it needs to be readily sliceable by a deli slicer. In my experience, delis can get kind of confused when you try to order cheese unsliced, but they’ll generally do it. I’ve also liked Pride of Wisconsin’s low-moisture whole milk mozzarella, which I’ve found in a Twin Cities supermarket deli counter.
Finally, restaurant supply stores may offer good cheese options at commercial pricing. Supremo Italiano, Restaurant Depot’s house brand, is fine, but not close to as good as the likes of Grande or Saputo. It’s worth noting that not every brand is offering the same product for their commercial and retail lines: Retail Polly-O is a completely different cheese from commercial Polly-O. I’m not sure if Galbani has different cheese for retail and commercial, but I always found their retail mozzarella to be bland.
Hard Cheeeses
For my New York pies with red sauce, hard cheese isn’t necessary, and for those pies I’ve come to prefer no hard cheeses at all. I still like hard cheeses for some white pies, though. It’s worth noting that as with mozzarella, pre-grated parmesan and Pecorino Romano are usually junk, and they have cellulose powder or starch added, so buy a wedge of whatever hard cheese and grate it yourself.
Parmesan is the default hard cheese choice for pizza, and I usually use some sort of Parmigiano-Reggiano on my white pies, pre-bake or post-bake (or both). Grana Padano is good too, even though it’s viewed as poor man’s parmesan, I like it, and it’s certainly a great value. No one’s eating a pizza and complaining that it’s garnished with Grana Padano rather than Parmigiano-Reggiano.
If you want a hint of gross sheep’s milk cheese, it’ll do the job for sure. I’ve found that I prefer Ambriola brand Pecorino Romano to Locatelli (Ambriola is responsible for importing both cheeses), but Fulvi is what I’ve been using lately, which can be found at Whole Foods, and I’ve been happy with it as a topping on my Sicilian pizzas.
I’ve never liked any of the hard cheeses or fresh mozzarella that I’ve tried from BelGioioso. I haven’t tried BelGioioso’s Platinum Label, which I’m told is a much more expensive improvement on their standard line, but there’s a lot of space between their standard line and good, and I’m not terribly interested in exploring that.
Wet cheeses
Delitia and Liuzzi Cheese’s both make excelellent fresh buffalo mozzarellas, and I’ve enjoyed the latter’s burrata.
I’m a big fan of Caputo Brothers Creamery’s fresh mozzarella. Their provola is also excellent, and it works well as a sharp provolone for hoagies, cheesesteaks and roast pork sandwiches, all of which can be made with my hoagie roll recipe. Caputo makes a great traditional fresh whey ricotta, and it’s the only whey ricotta I've ever loved.
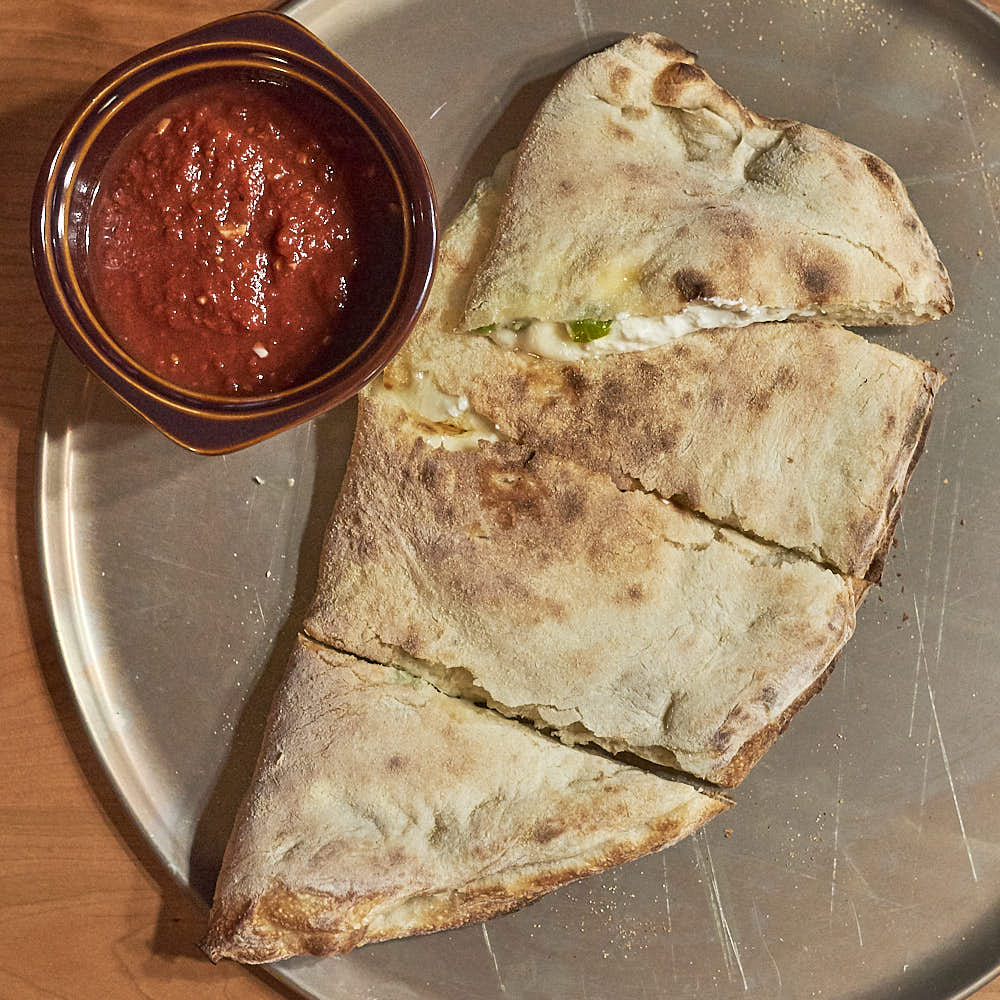
Smitten Kitchen’s ricotta recipe, which is based on Salvatore Bklyn’s ricotta, is very good for those interested in making it yourself. It’s a whole milk ricotta made with an added acid rather than a ricotta made from leftover whey and rennet, which some may sound blasphemous to some. Works well as a pizza topping, or even better inside of a calzone, which you can make with this dough recipe: stretch the dough like you would a pizza, press the edge down flat, place all of the toppings on one side of the dough, fold it over, vent the top, and bake. Or, make a smaller dough, skip those last two steps and deep fry the whole thing to great success.
Calabro’swhole-milk ricotta works well and can be found in some supermarkets.
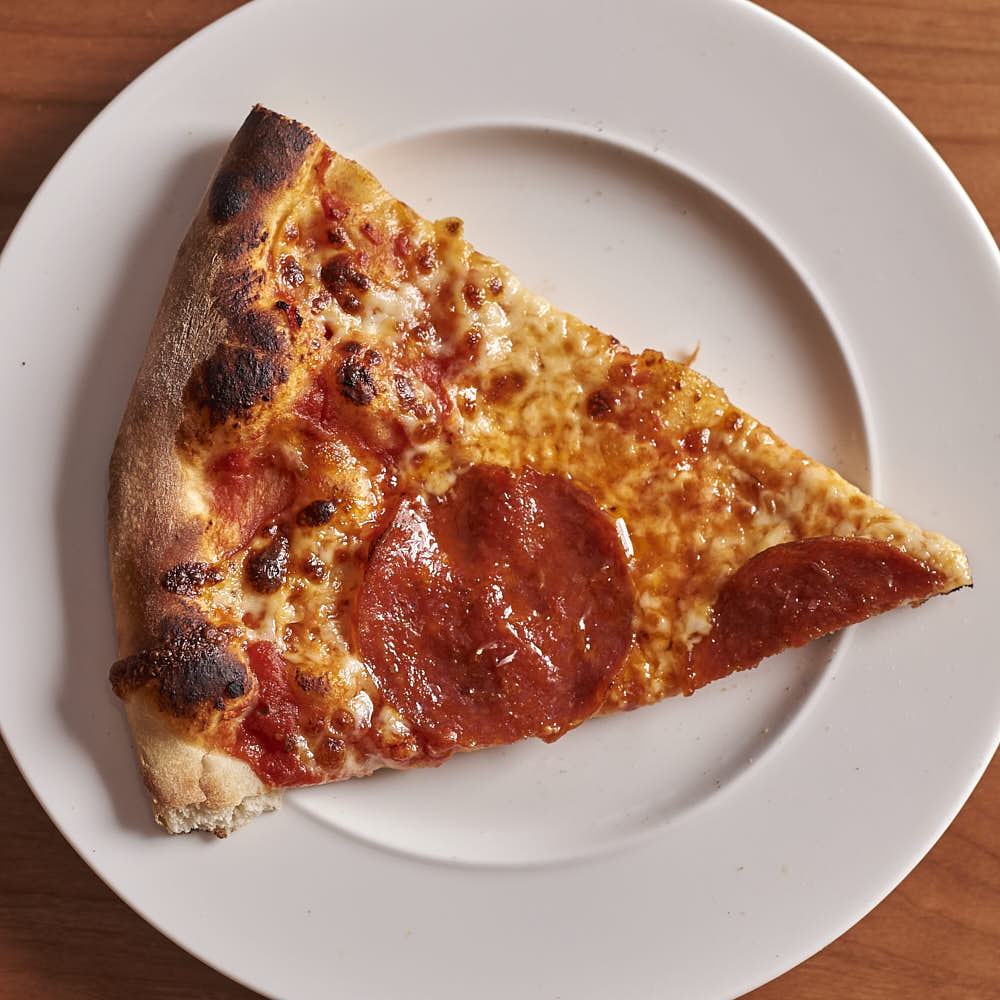
Pepperoni
I believe that the best pepperoni for a New York slice is a larger flat pepperoni. I think sandwich pepperoni, or larger-bored sticks of pepperoni, are ideal for New York-style pizza.
My favorite pepperoni on the planet is from Salumeria Biellese, which now can be ordered in as small as half-pound quantities with free shipping. And really, everything I’ve had from them stands as the best of that offering; the guanciale is especially excellent, too. But if you order the pepperoni from Salumeria Biellese online, due to its relatively large diameter, it can be tricky to slice at a uniform thickness with a knife, and I strongly prefer using a deli slicer. Larger diameter pepperoni like this are difficult slice well with a knife.
If you need to store pepperoni long-term, be sure to store it unsliced, if possible. Pepperoni used for frozen pizza is treated with an anti-oxidant to mitigate graying in the freezer. Pre-sliced pepperoni will typically be in a gas-flushed bag, and vacuum sealing generally isn’t sufficient to mitigate the oxidation for frozen pepperoni.
On the more accessible side of sandwich pepperoni, Boar’s Head and Margherita each sell a sandwich pepperoni that works well on New York-style pizzas, and you can find them in supermarket deli sections. Hormel 1891 is a new retail brand of sandwich pepperoni that should be comparable to the offerings from Boar’s Head and Margherita. If you can’t get any of the aforementioned pepperoni, my suggestion is to experiment with large-bored pepperoni that are sliced fresh by your supermarket deli section.
Cupping Pepperoni
Small cupping pepperoni are great, too, and I use them for Sicilian pizzas and bar pizzas, but I think the pepperoni aren’t the ideal type for New York-style pizza. With that said, I’ll talk about cupping pepperoni assuming that you will use the knowledge for other styles of pizza.
The tension on the pepperoni casing is a major contributor to a pepperoni’s ability to cup. As far as natural casings go, collagen casings can handle exerting more pressure on the interior pepperoni than an intestine-based casing, and so when all else is equal, you’ll see more aggressive cupping with a collagen casing.
My favorite cupping pepperoni is Hormel Rosa Grande. It’s made with whole pork picnic cushion cuts and beef trimmings, and it cups readily. It’s the same pepperoni Prince Street Pizza uses, which is the worst kept secret in pizza. If you’re in an area with ShopRite, you might be able to find Rosa Grande sticks at yours. Hormel has also recently introduced Cup N’ Crisp pepperoni, which is rebranded pre-sliced Rosa Grande specifically designed for the retail market.
Like Rosa Grande, Ezzo’s GiAntonio uses pork picnic cuts and beef trimmings. It’s a fennel-forward pepperoni with a bit of smokiness through liquid smoke. Like Rosa Grande, this pepperoni will cup aggressively. Nearly every major New York pizzeria with cupping pepperoni is using either Ezzo pepperoni or Hormel’s Rosa Grande pepperoni.
Boar’s Head also does a very nice cupping pepperoni, which is made by Margherita. As far as I know, Boar’s Head does not make their own products, and you can check the United States Department of Agriculture establishment number on the pepperoni’s packaging (or any meat product packaging in the United States) against the USDA Meat, Poultry and Egg Product Inspection Directory to uncover its provenance. Regardless, it’s good, and it cups readily. It’s different from Margherita’s own natural casing offering, which doesn’t cup nearly as well, and it tends to be a bit more aged, but it’s a good pepperoni nonetheless.
Vermont Smoke and Cure is pretty similar to Boar’s Head, though it’s a “natural brand,” and the brand claims that there are “no nitrite or nitrate added.” Vermont Smoke and Cure, specifically adds Swiss chard powder to their pepperoni, which contributes nitrates. The nitrates reduce to become nitrites, and the nitrites start to form nitric oxide, which binds to myoglobin, the protein that colors meat red. Once bound, the nitric oxide keeps the meat red even after cooking.
Any meat product that’s red when cooked almost certainly has nitrites of some form in it. Most pepperoni is cooked (Tempesta is the only source of which I know for uncooked pepperoni) and there’s almost certainly nitrites. In the case of organic and natural
products, they’re adding nitrates through sources like celery powder, cherry powder, or Swiss chard powder. The nitrates become nitrites, and thus there’s nitrites in the meat. It’s misleading to claim the product is “uncured“ and that “no nitrite or nitrate added” when Swiss chard powder and celery powder are added specifically as a source of nitrates, but the USDA has required that specific language.
And I’d be remiss if I failed to mention the pepperoni offerings from both Dietz & Watson and Molinari and Sons. I’ve tried them, and I’d say that’s enough for both of us.
Other Toppings
When it comes to toppings, you can still have a New York-style pizza if you top it with raw mushrooms, raw bell peppers, raw broccoli, and the like. Rejoice in the fact that your pizza will not be marred by inauthenticity for those toppings, and know that you will have an authentic New York-style pizza that you’ve turned into complete garbage with wet, bland, thoughtless toppings. I shouldn’t have to be the one to tell you that a fistful of ingredients straight from a Ruby Tuesdays salad bar is a terrible pizza topping.
Part of why restaurant food tastes better than what most people make at home is because generally, each component of a meal is seasoned separately. Do that. Ingredients won’t necessarily taste better just because they were baked on a pizza. Salt your toppings. For many of the vegetables that aren’t sliced, you’ll want to pre-cook them. Ricotta can be great on a pie. Taste it first. Does it need salt? Do you want to add some grated Pecorino Romano? If something doesn’t taste good on its own, it’s not going to taste good on a finished pie unless you take action.
Some toppings should necessarily be added after the pizza is done baking, or post-bake: basil, while basil is added pre-bake for Neapolitan pizza, when it comes to New York-style pizza, it should always be added post-bake due to the timescale of the cook, which can take five times as long to bake as a Neapolitan. Similarly, Mike’s Hot Honey ought to be added post-bake, and so should the paradigm-shifting Extra Hot variant. And while ranch dressing on New York-style pizza is a distressing thought, Emmett’s phenomonal Hot Poppy bar pizza has proven that at least paprika ranch can be great. If you must use ranch, never ever put it on pre-bake.
Making It Great
Practice
When I first started out, I practiced launching pizzas by taking a dough, launching it onto my lightly floured counter, and then picking it up again and repeating the process over and over. You should be able to launch a pizza cleanly and efficiently without deforming the pie. Pizzerias will train employees to launch this way, and they’ll have them top a sauced pizza with uncooked rigatoni or something similar to emulate cheese. The noodles enable pizza makers to practice launching in such a way that they don’t disturb the pizza toppings.
If you’re nervous about launching pizzas, make an extra dough or two for your first run, and practice this way. Your comfort level will rapidly improve through low-stakes practice like this. At the very least, I suggest starting with launching bare dough over and over on your counter until you get the mechanics down.
Dough Calculator
The default values of the calculator below will give you the ingredient weights for four doughballs sized for 16-inch pizzas, and the default value for yeast gives a dough targeted for three days of cold fermentation. Adjust the diameter and number of pies as needed, but my suggestion is to stick with that yeast amount for at least your first attempt. If you want to use the dough after two days or four days, it’ll be fine, but you should do at least one dough after three days for optimal results. Going too far beyond three days of cold fermentation will lead to a decrease in dough strength and viscosity as the dough becomes overfermented.
To reiterate, this recipe assumes the use of King Arthur All-Purpose Flour, and in terms of strength, the flour is really more inline with the bread flour offerings you’d find from most brands in the supermarket. Typical supermarket all-purpose flour is much weaker than what’s needed for this recipe, and you should not buy it to make New York-style pizza. With that said, I find King Arthur Bread Flour too chewy, and I prefer the stretching characteristics of dough made with King Arthur All-Purpose Flour.
The recipe is designed around SAF Red Instant Yeast. Other instant yeasts or even active dry yeasts will probably work similarly given the long timescale of the recipe, but SAF is my strong recommendation. I recommend Diamond Crystal Kosher Salt in general, and the same goes for this recipe, but since the measurements are by mass, any basic pure salt at a vaguely similar coarseness will likely give the same results. The sugar is basic white sugar. I suggest you don’t color outside of the lines too much for your first run.
I developed this recipe using canola oil, and for years I used that with great success. There’s not enough fat in the dough that you’ll notice a substantive flavor difference between using canola oil and olive oil, but I’ve used that too. Lately, I prefer handling the dough when it’s been made with lard, though any fat with many small fat crystals should perform similarly. Do not under any circumstances use butter in lieu of a pure fat—butter can be up to 20% water. This recipe assumes you’re using pure fat, and I stick to fats like canola oil, olive oil, vegetable oil, lard or shortening. Regardless of my choice of fat for the dough, I use canola oil to oil my proofing containers.
Dough Calculator
The thin
thickness option will give you the same thickness that I use for all of my New York-style pizzas, while medium
will give you a result similar to the average New York slice shop, and thick
will give you a thicker New York-style pizza. All three of those thickness values are within the realm of New York-style pizza.
Advanced mode will let you change the parameters for the various ingredients, and it will afford you a wider range and more granularity in selecting the target dough thickness. The dough calculator will work for any dough made with up to six ingredients, including flour. And if you’re concerned that your dough yield will be less than what you need to make your pizza, you can bump up the thickness slightly in advanced mode so that you have a little extra dough.
Kneading
You can concern yourself with dough temperature, but my recommendation is to not worry about it, and try to keep the dough cool. Use cold water (tap cold is fine). Don’t overmix your dough—mix it until it’s smooth, and you’ll be likely be fine.
Food processors are inappropriate for mixing and kneading New York-style pizza dough as they can rapidly overmix dough and promote non-uniform gluten development. Similarly, the no-knead method requires a much wetter dough than is used for New York-style pizza, and it can result in overfermentation and non-uniform gluten devleopment. When making New York-style pizza dough, you should mix by hand or use a mixer.
By Hand
You can knead a great pizza dough with just your hands. In general, I mix my dry ingredients together in a bowl, and then add the water and fat.† Mix within the bowl using a spoon or a spatula—I like to use a wooden spoon or a unibody silicon spatula.
Once the dough comes together into something vaguely homogenous and the flour is incorporated, put your dough onto your work surface—I like a large wood cutting board the best—and start to knead the dough. Use a bench scraper, if the dough starts to stick.
If the dough ends up being too sticky after it’s all together, do not add bench flour. Do not add bench flour. Bench flour perturbs the recipe, and it’s a short-term solution that masks the actual reason why a dough is still sticky. If you truly need more flour (that’s a big if), then you should adjust the original recipe rather than compensate haphazardly and dilute the concentration of every other ingredient.
If the dough is stickier than you want to handle, cover the dough with a flipped over bowl and walk away for 15 minutes. Let the yeast do the work. Walking away from the dough can make a world’s difference in mitigating stickiness. Either way, knead until smooth, and you can walk away multiple times if necessary, as long as you cover the dough with the bowl (covering with a towel is insufficient here).
Stand Mixer
With KitchenAid stand mixers, I suggest pre-mixing the dough in the mixer bowl, until all of the flour is incorporated.‡ Run the mixer (on “stir”), until the dough is smooth, about seven-to-ten minutes. If the dough is almost smooth, and it starts to climb the dough hook, just remove the dough, place it on a wood cutting board (you can place it on anything but it’s easier to deal with on a wood cutting board), knead it together briefly, and then place the mixer bowl, or any bowl that’s large enough, over the dough. Wait 15 minutes and return.
Spiral Mixer
If you have a spiral mixer with a breaker bar, you can happily just pour all of the dry ingredients into the mixer bowl and run the mixer while you weigh out the fat and water.‡ Add the fat and water, and mix on the lowest setting until almost all of the flour is incorporated (could be a few minutes, but it depends on the amount of dough) and then bump the speed up to finish until the dough is smooth.
Note on Fat and Salt
In general, you can speed up gluten development by withholding salt, sugar, and oil until the dough is homogeneous, and then adding the salt and sugar, letting it mix in, and then adding the fat. New York-style pizza has such low concentrations of those ingredients that it shouldn't make a substantive difference in the resulting pizza, but it will speed up the mixing of the dough, and this is an especially useful technique for doughs with significantly more fat or doughs for which developing gluten is difficult, like rye breads. It can be kind of messy to incorporate fat into a hand-kneaded dough once the dough is fully together, but this is easy enough to do with a mixer.
Balling and Proofing
Regardless of how the dough was mixed and kneaded, once the dough is together and smooth, flip your bowl over the dough, and let it sit for 30-45 minutes. If your dough felt pretty warm after being mixed, you could let it sit as little as 15 minutes.
Using a bench scraper and scale, start cutting off sections of the dough and weigh to your desired amount (or evenly divide the dough into the number of pizzas that you need). If your yield is particularly bad, and you’ve lost a bit of dough, make slightly more dough next time and measure off the exact amounts that you need.
Ball your dough. Balling your dough will go a long way toward helping you end up with a circular pizza. Pick the dough up and fold each end of the dough inward, repeatedly. The dough will become more round as you continue folding. There should be only one seam on the ball—pinch it closed. Place the dough ball on your work surface with closed seam against the work surface (wood works best). Rotate the dough on your work surface and gently push the dough inward with one hand as you rotate to enforce a ball shape.
Oil the entire interior surface of your proofing container and wipe it with a paper towel or cloth until thin layer of oil remains. Place the dough ball in the proofing container.
Once the dough is in its proofing container, place in your refrigerator to proof. With King Arthur All-Purpose Flour, given the protein content, namely, the glutenin, you should be able to safely use leftover dough after four or five days, but three days is ideal and you should aim to use some at least some of your dough at the three day mark.
Preparation
Take your dough from the fridge around three hours prior to baking. In a relatively cold kitchen, you might want to aim for four hours. Note that in a particularly humid kitchen, the dough may warm up more quickly, and conversely, in a very dry kitchen, the dough may need slightly more time to warm up. Don’t worry too much, though: in general there’s a pretty wide window for how long the dough should warm up. In my cold and extremely dry kitchen, prior to having a whole-house humidifier, I took my dough out of the fridge five hours prior to baking, and that worked well for me.
If you have a dough that’s targeting a three-day ferment, and you’re making pizza a day earlier than that, you might want to have the dough out at room temperature for slightly longer, and similarly if the dough has been sitting around for longer than three days, consider letting it sit out at room temperature for less time. There’s too many variables to make it a feasibly calculable precise science, and you can start by giving or taking a hour and seeing what works for you. You aren’t likely to kill your pizza with those kinds of pertubations in fermentation time.
For those using a metal proofing container, take dough out of its container as soon as you remove the dough from the fridge, otherwise dough can tend to stick to the metal. Without this technique, metal proofing containers can require a lot of oil in order for the dough to be cleanly removable, and using that much oil can cause excess flour to stick to the dough. Remove the dough from its proofing container while it’s still cold by gently scooping under it with a bowl scraper in a circular motion around the circumference of the dough.
Carefully remove the dough from its proofing container. Place the dough on a cutting board or skip the cutting board use a different lightly oiled proofing container if you have one. Wipe the proofing container clean, add some oil, and wipe the oil uniformly across the entire interior of the container, including the sides, until you have a thin and light layer of oil. Replace the dough in the freshly oiled container and keep the original bottom of the dough facing down. Now you’ll have a significantly easier time removing the dough from the proofing container once it eventually warms up, and you can do so with much less oil.
If you’re baking in a home oven, preheat your oven with a steel in it positioned at about seven inches from the top of the oven (approximately middle rack), at least an hour and a half prior to baking. If your oven has convection and can do 550°F, preheat with convection 550°F.
If you’re baking in some other type of oven, preheat appropriately.
Generally, convection adds 25°F to the effective temperature of the oven. Some ovens will automatically compensate for that, and set the oven temperature 25°F lower. I generally turn that feature off if possible. I do convection roast at 550°F for my pizzas.
If you don’t have convection, preheat to 550°F. If you can’t do that, preheat as much as you can.
A half hour prior to cooking, take your cheese, sauce and other toppings that aren’t raw meats out. It’s not critical, especially if your oven is very hot, but I generally try to take the ingredients out in advance. Get a pizza serving pan ready so you have a place to put your finished pie. Also, have your metal retrieval peel nearby.
Flour your wooden launching peel. You can use semolina flour to dust your peel, and that’ll help prevent your dough from sticking to the peel. You don’t need much semolina flour, just make sure the peel is uniformly covered.
I have a dedicated container of bog-standard AP flour that I keep around labeled “Flour 4 Drops,” and you should have one, too. Make sure it’s bigger than your proofed dough and that it has plenty of flour in it. Grab some flour and coat your work surface well with it. And as far as work surfaces go, the smoother it is, the better, and you’ll want a surface on which the dough can glide readily —metal and natural stone work well.
Stretching
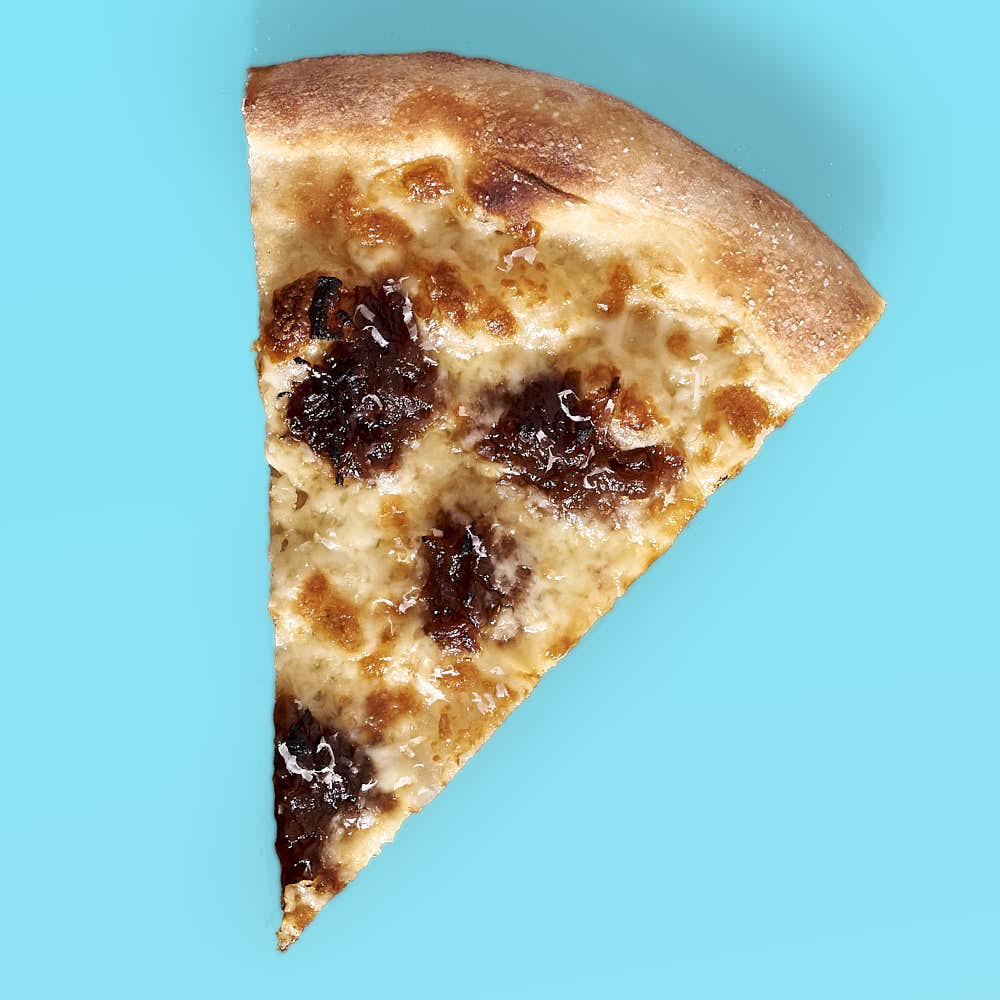
New York-style pizzas should be circular, and that claim is not just about aesthetics: stretching to a shape that’s close to a circle helps enforce a uniform thickness for the interior of the pizza, which means that the resulting pizza will cook uniformly. Pools of grease at parts of a pizza may point to thin spots in the crust due to the stretching of the dough.
You can see an example of grease pooling due to a thin spot in one of my bar pizzas. I hand stretched that one, and if you look near the middle of the pizza, to the left, you’ll see the region that I’m describing (unlike New York-style pizzas bar pizzas should always be rolled with a pin). Thin spots like those can contribute to floppiness, and depending on the extent of the problem, it can impact taste: if there’s thin spots, then the rest of the pizza is necessarily thicker. And thicker means different melting dynamics.
When I first started trying to make New York-style pizza dough, there were nights where I’d make multiple pizza doughs, and I knew there was a good chance that I wouldn’t be able to eat a pizza for dinner because I’d fail in shaping it. I was setting myself up for failure: I wasn’t forming a dough ball hours prior to trying to stretch it, and so, I had a mess of dough and trying to shape it into a circle was hopeless. I missed the fundamental law of pizza making: start with a circle, end with a circle.
Stretching pizza brought me tremendous stress, and at points I thought it was impossible for me to do it. I couldn’t even comprehend making dough circular—I was tearing nearly every dough that I touched. I’d often have to ask Abby to stretch the dough and save our dinner, and against all odds, they often could turn my arbitrary blob of dough into a pizza. But my stress was caused by my belief that stretching pizza was difficult, and it truly isn’t.
Kneading the dough until it’s until smooth, shaping the dough into a ball (and closing up any seams in the ball) prior to the dough going in the fridge, and having a large enough proofing container from which you can remove the dough without deforming it, are all things that set you up for success when it comes to stretching a pizza dough. And with the appropriate measures taken in advance, combined with a flour that yields a sufficiently strong and extensible dough, the dough should more or less stretch itself.
With a bowl scraper, carefully detatch the edge of the dough from the proofing container, in a circular motion to maintain the dough’s round shape. Remember, if you start with a circle, you’ll end up with a circle.
Once the edge of the dough has separated from the proofing container, flip the proofing container into your container of flour, and the dough should cleanly fall out into the flour. Flip the dough so that both sides are covered in flour. Don’t worry about all of that flour: you’ll shake it off as part of the shaping process.
The side of the dough that was originally in contact with the proofing container should be the bottom of the pizza. Scarr Pimentel of Scarr’s Pizza, convinced me to keep the dough’s bottom as the bottom of the resulting pizza for the best crust appearance, and it does yield the best crust appearance with no detriment in terms of dough stickiness.
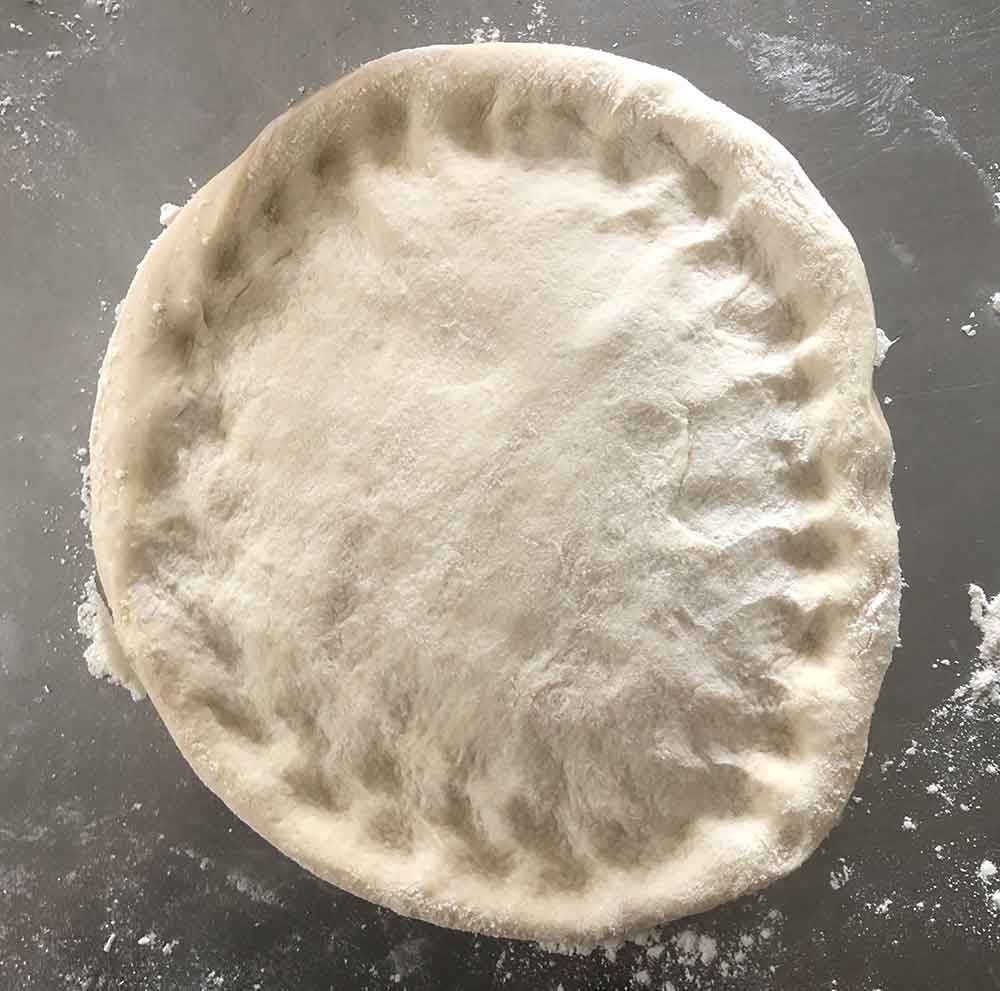
Place your dough on the floured work surface, and very carefully with your fingers start to poke the top of the dough with your finger tips toward the edge of the dough in order to define the rim. Make the rim area narrow and leave the rim untouched—do not compress the rim. Once the rim is fully defined, start to poke the entire interior of the top of the dough, and be sure to repeat poking the area adjacent to the rim to make sure it’s well-defined.
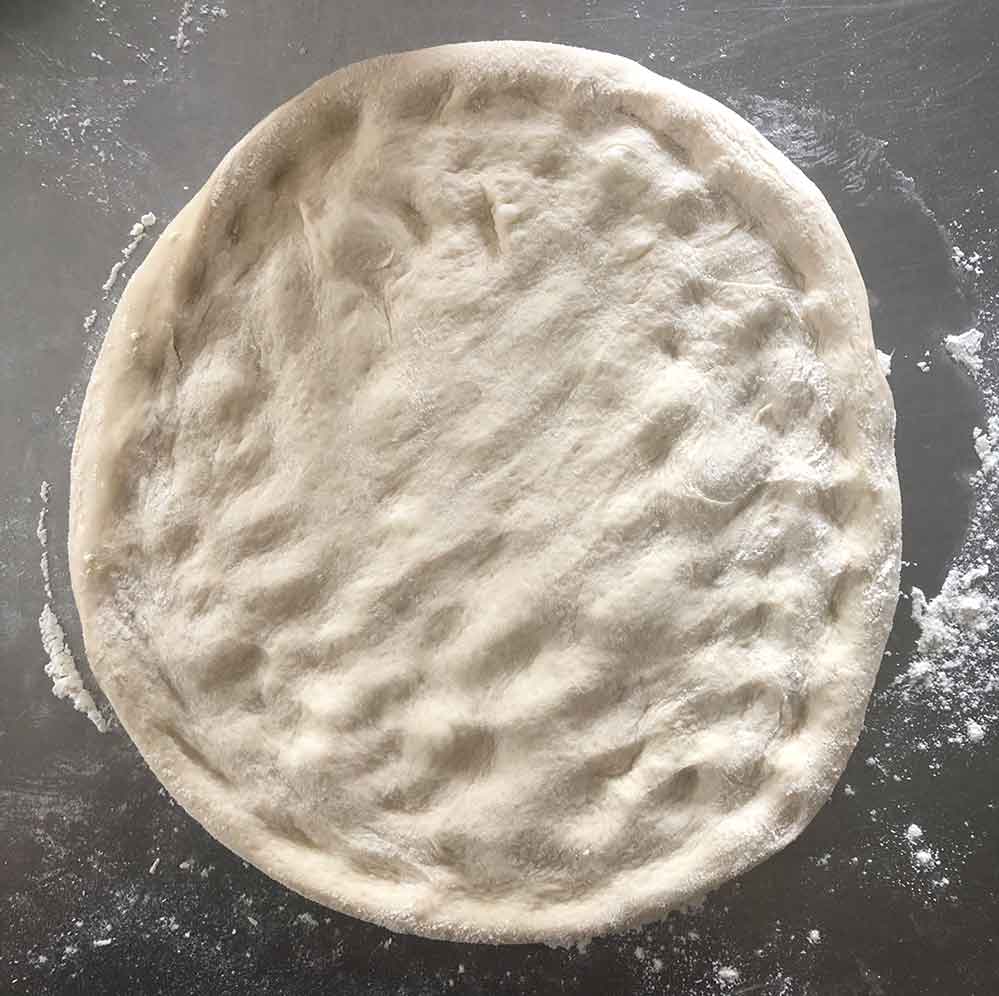
Once you’re done poking your dough, place the base of your hand adjacent to the inside of the rim of the dough, and use the base of your hand to stretch the edge of the dough outward as you rotate the dough with your other hand. Take care not to deflate the rim of the pie.
Repeat the motion for several rotations. This motion helps mitigate the thinning of the center of the pizza and serves to facilitate stretching the dough to a uniform thickness. The number of ideal full rotations necessary is a function of the size of the pizza. Larger pizzas will require more rotations than smaller ones. Do four or so full rotations for a 16-inch pizza, adjust if necessary for future stretches—don’t worry about the exact number too much. You can see pizza makers do the same stretching technique, if you watch carefully.
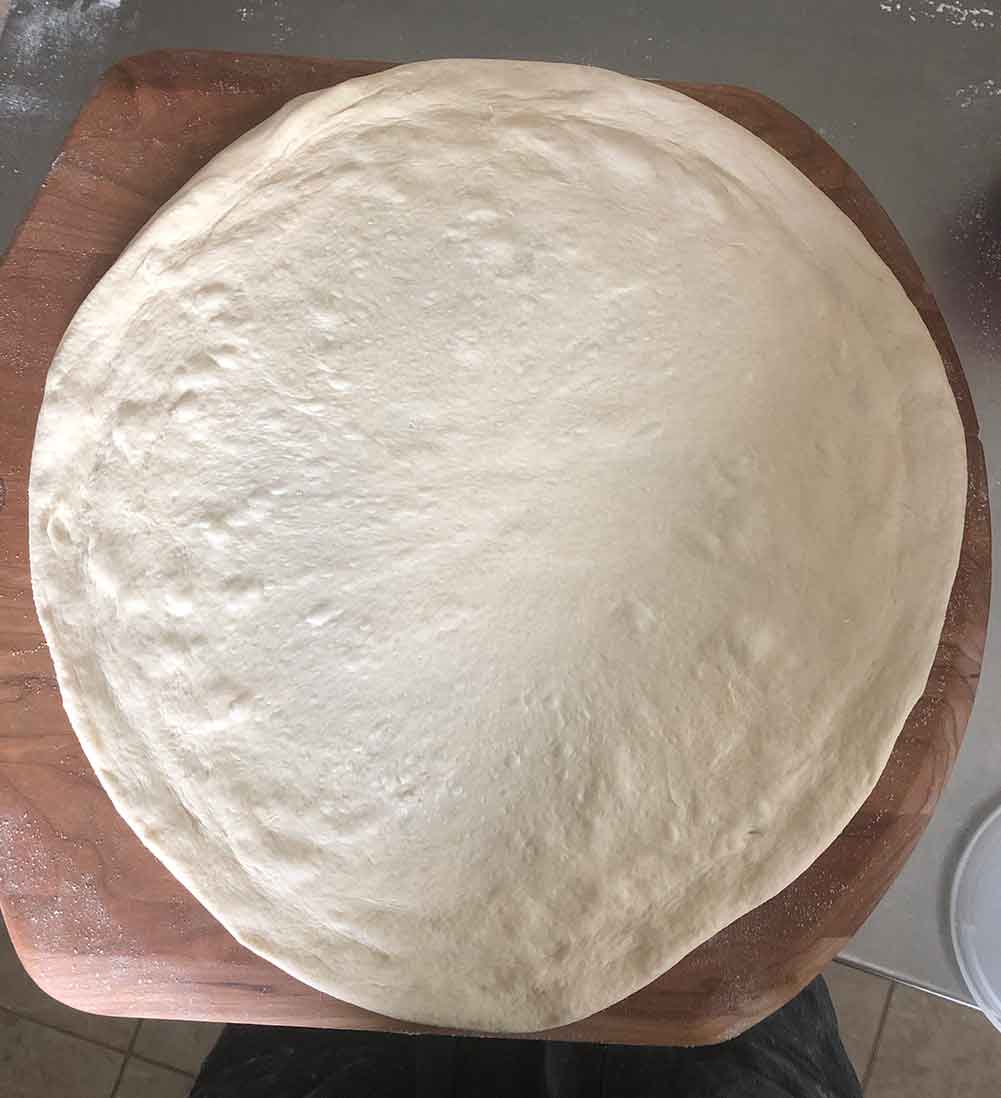
Once you’ve finished stretching the dough on your counter, put the dough onto your knuckles with the top of the dough facing toward you. Curl your fingers inward toward the palm of your hand, away from the dough. Try to knock off any excesss flour at this point. Keep your knuckles close to the rim of the dough, and rotate and stretch the dough using your knuckles.
If you need to pause for any reason, or if you just want to see if you’ve sized the dough properly, just place the dough carefully on the peel. Don’t return the stretched dough to your flour work surface—nobody wants to eat a pizza with caked on bench flour.
Once your pizza is stretched to the appropriate size, place it on your peel, with the top of the dough facing up. Carefully shake the peel back and forth to confirm that the pizza is able to move freely.
Topping
One thing to note is that even with the best stretching technique, the center of your pizza could still be slightly thinner than the rest of the pie, and toppings could tend to gravitate toward the center as it bakes. In general, avoid overloading the pizza near the center while topping it.
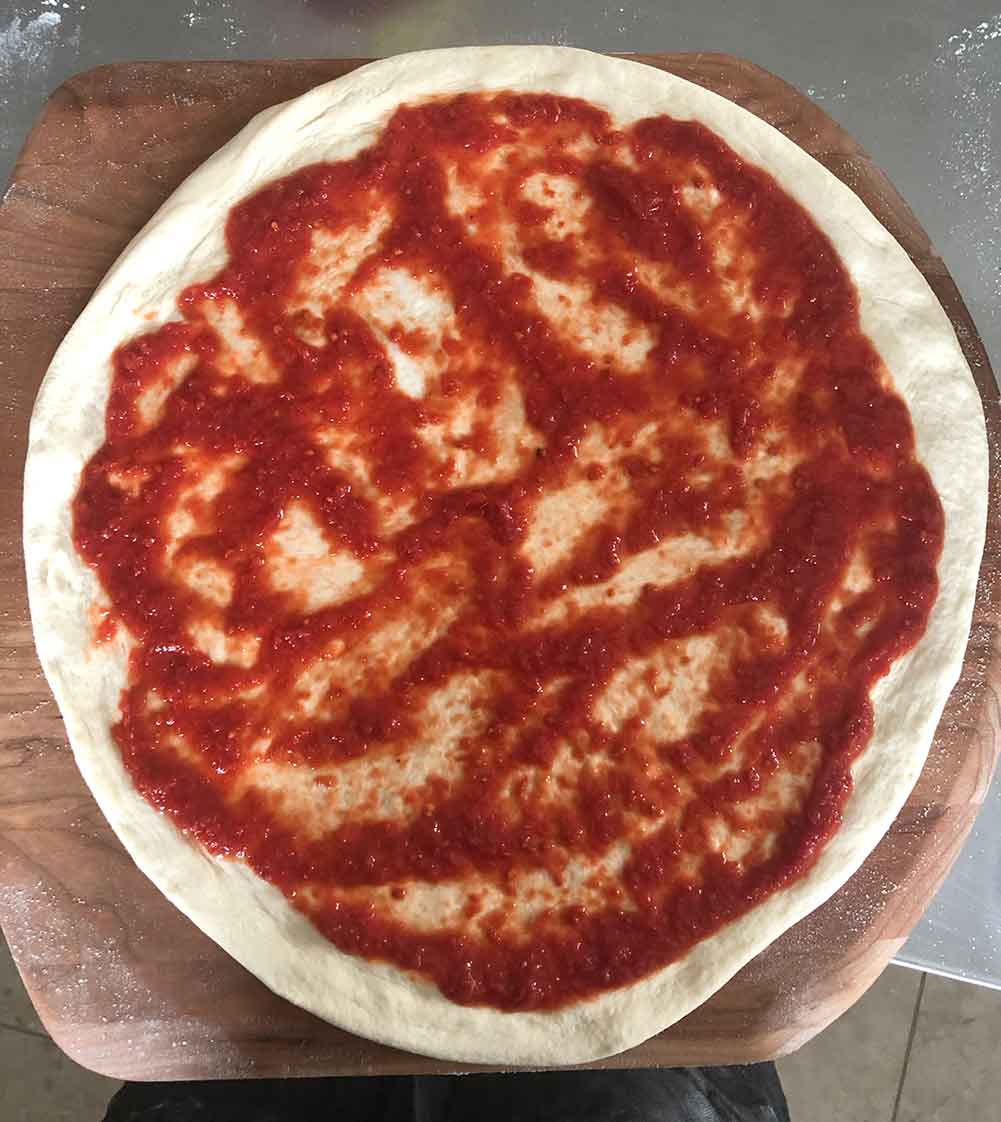
If you’re making a pizza with tomato sauce, spoon your tomato sauce on the pizza, and with a large spoon: drop the sauce at the center of the pizza and spiral it outward. Stop saucing just before the rim of the dough. If you’re worried about your dough sticking to your peel, after you sauce the pizza, it can be a good time to gently shake the peel back and forth to ensure the dough moves freely. You can repeat the shaking after each topping, but all of the shaking is optional to give you assurance that your pizza won’t stick.
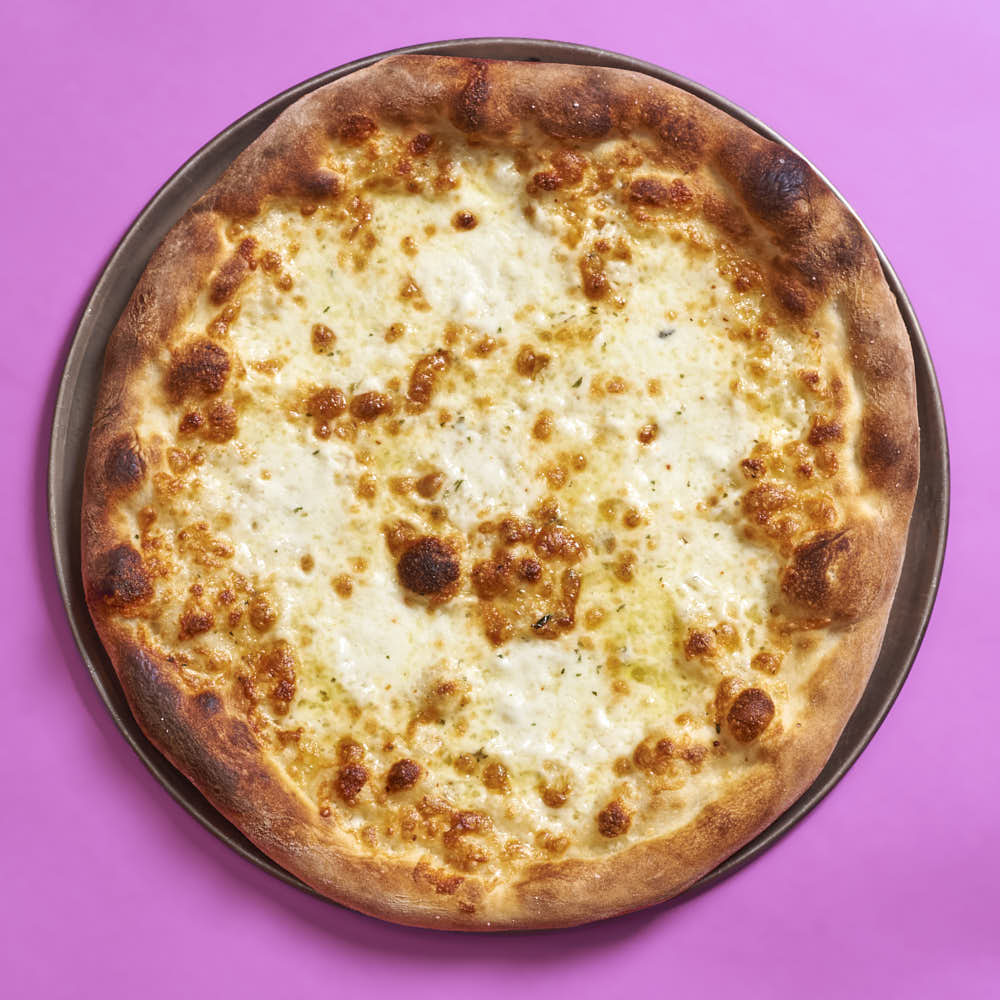
If you’re making a white pie, you can use a small container of water and spoon a small amount of it over the dough, and spread it with the back of your spoon like you would with tomato sauce. The water helps compensate for the lack of moisture without tomato sauce. I used to use olive oil on the white pies in lieu of sauce, but I’ve come to prefer a small amount of water as the olive oil tends to fry everything, and the pizzas can get oily if you’re using whole milk mozzarella. If you’re using a lot of toppings that contribute moisture you can forgo the water entirely.
Grab some cheese and place the cheese in a spiral pattern around the sauced pizza. Fill in the gaps so the cheese is uniformly distributed. Place the cheese over all of the sauced area, but avoid placing any cheese beyond the sauced region of the dough, and know there’s no shame in picking up a shred of cheese and placing it elsewhere if you have a bad placement.
If you’re using entirely whole milk mozzarella without any part-skim mozzrella cut in, you may want to lightly salt your cheese, especially if you aren’t adding salty toppings like pepperoni. Sprinkle a small amount of salt on the pizza. If you sprinkle the salt from higher above the pizza, you can get a more uniform coverage without having to apply a lot of salt. Err on the side of less salt until you get a feel for how much you need for your cheese.
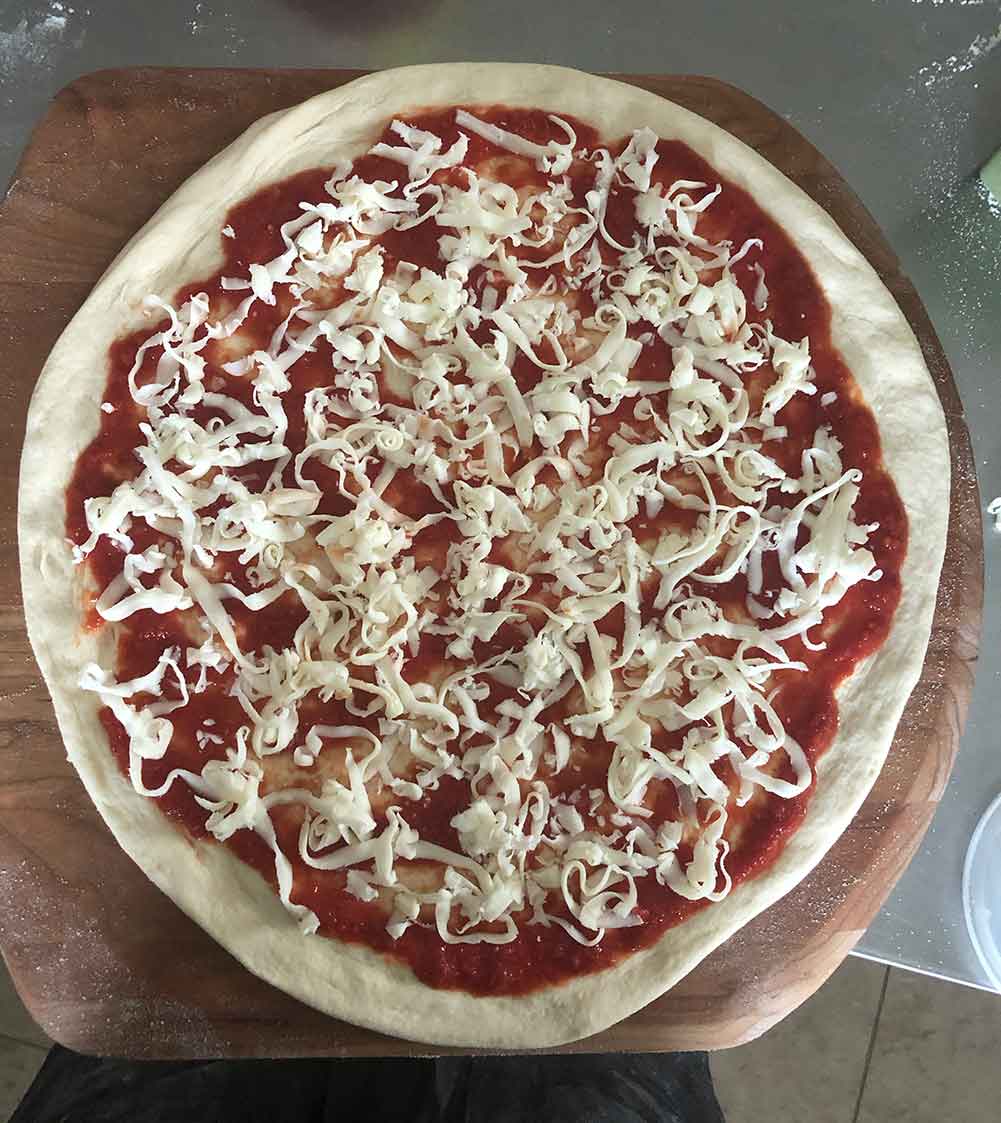
If you want to top your pizza with pepperoni, pieces of fresh mozzarella, vegetables, or anything else, place them after you place the cheese. Distribute the toppings uniformly, and you should especially avoid center-loading your topping at this stage.
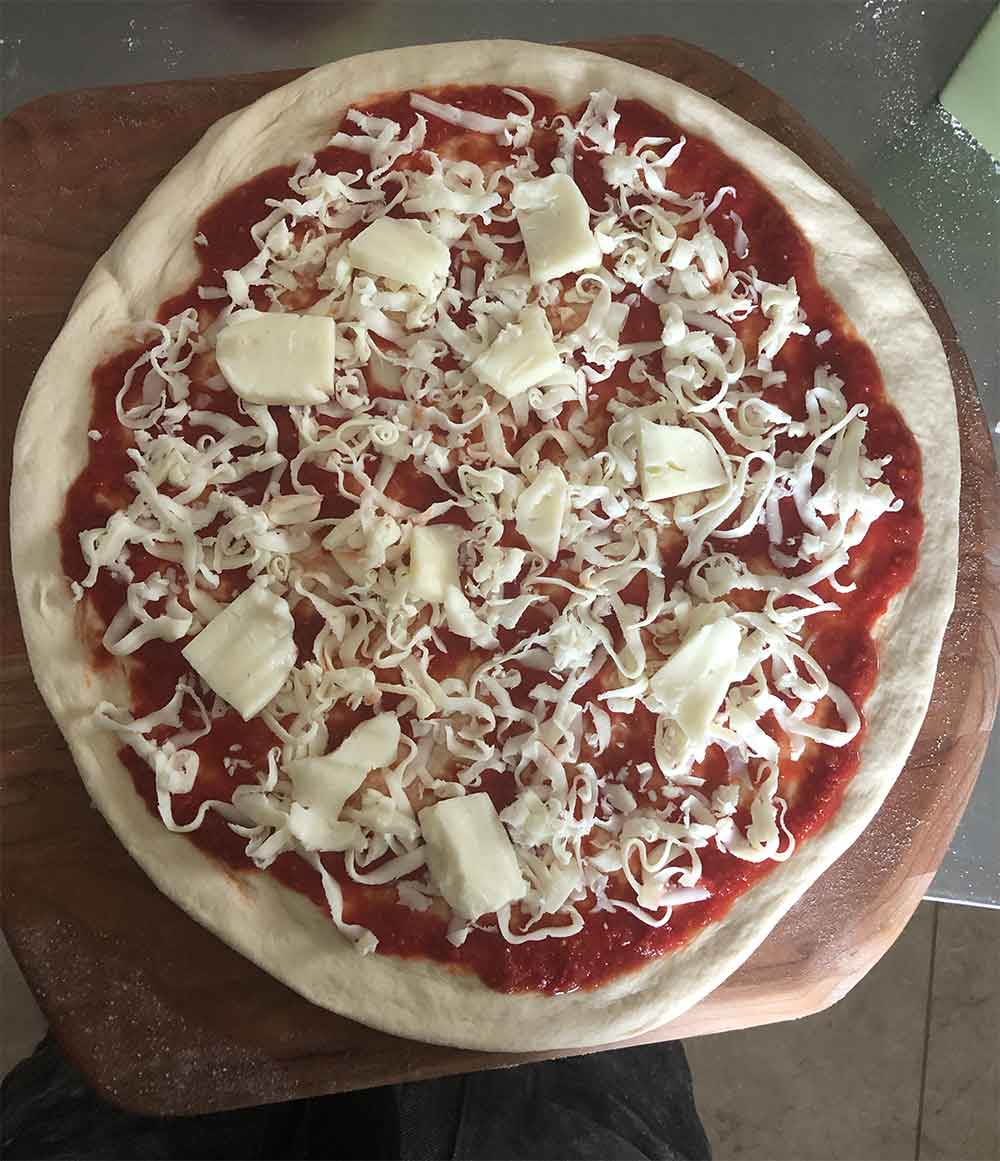
Launching and Baking
Once the pizza is topped, shake the peel back and forth to guarantee that it moves. Open your oven door, place your peel just above the rear of the steel, and shake the topped dough onto your steel.
Once your pizza is in the oven, set a timer for two-and-a-half minutes. When your first timer comes up, rotate your pizza. If your oven heats very evenly (mine does not), you can skip the rotation step. I burn the bottom of mine, and half of it is undercooked if I don’t rotate.
If you’re not using convection, with two-to-three minutes of bake time remaining, turn on the broiler of your oven to provide enough heat for the top of the pizza to cook.
After four or five minutes the pie should be done, but really, it’s done when it looks done. When the pizza is finished cooking, you should notice the cheese bubbling, and the crust ought to be at least lightly browned. If the pizza needs more time, give it more time. Remove the pizza with your metal peel, and place it on your serving pan. Wait at least three minutes before slicing, and for the cleanest slices, stamp the pizza cutter at the center of the pizza and slice outward.
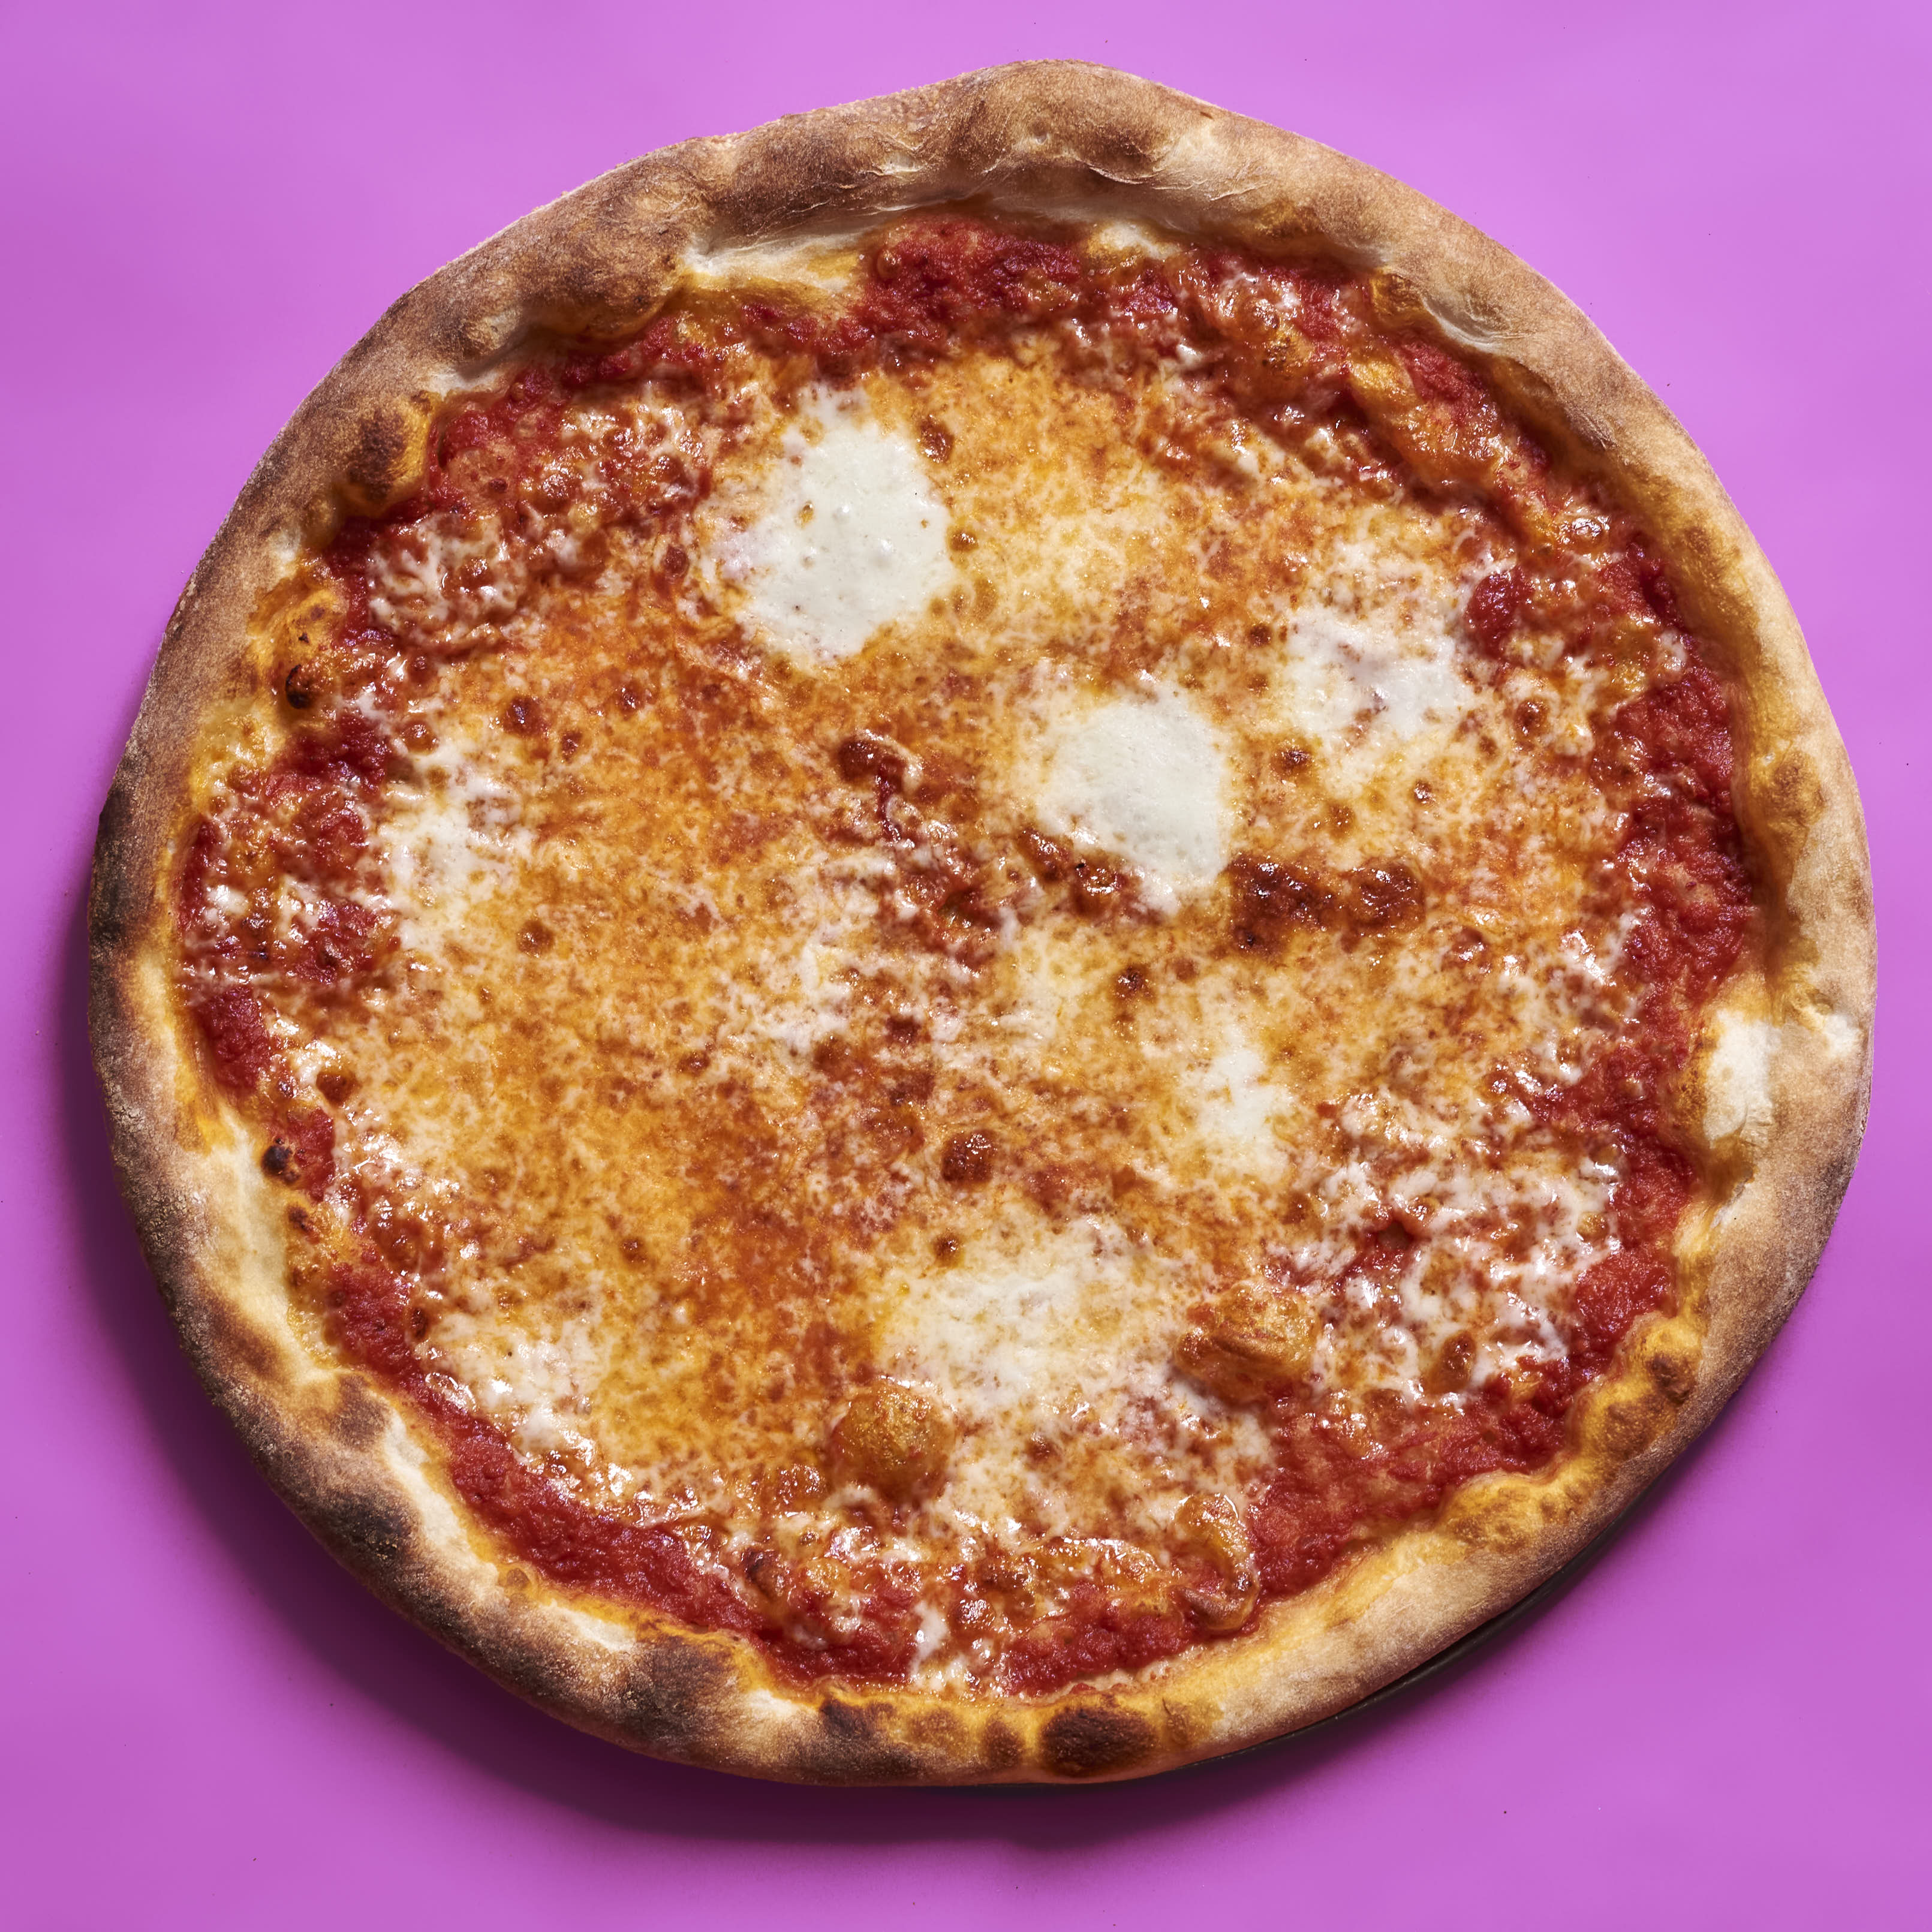
Next up in The Secret of My Success
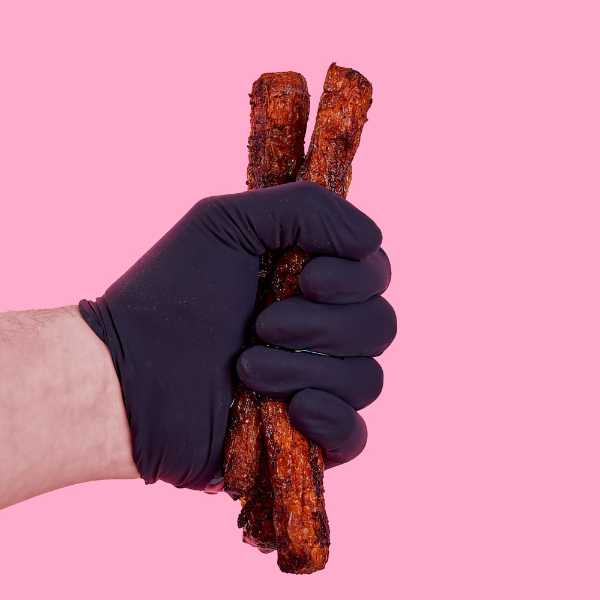
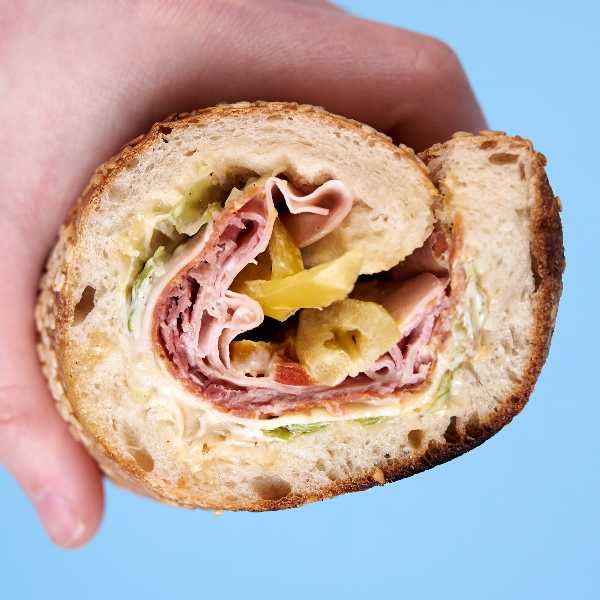
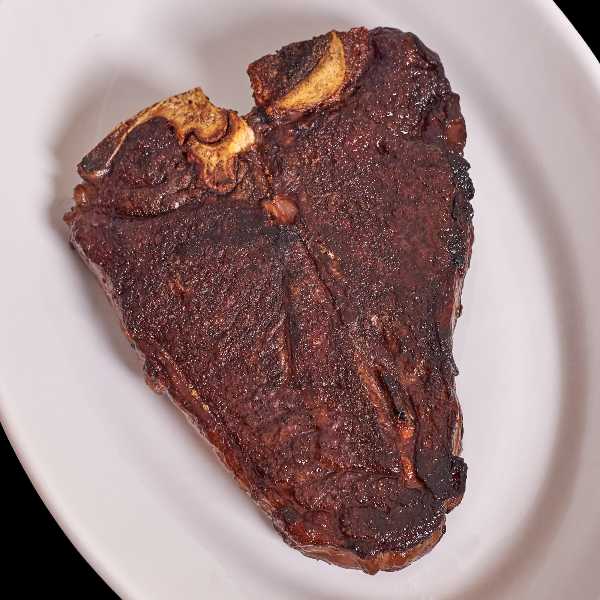
The Latest

Tony Liu and Lindsey Schuyler’s abject failure in reckoning with antisemitism.